How to restore a WordPress backup?
In this guide, we will introduce you to various ways how to restore your WordPress website in an emergency with a previously created WordPress backup.
Table of Contents
Restore a WordPress Backup with BackWPup Pro – NEW
Since version 3.5, BackWPup PRO helps you to restore the website backups you made with our backup plugin. The restore feature is integrated in BackWPup PRO which means you can start the restore process in your WordPress backend directly. To do this, you simply need a backup which was created with BackWPup. In case your website is destroyed completely and you don’t have access to your backend anymore, you can use the restore standalone app which you get as PRO user.
In our BackWPup restore documentation you can read how the restore with BackWPup works in detail.
Manually restore a WordPress Backup
Besides that, there are some tools to restore your WordPress website from a backup.
Here we explain how to restore the database with phpMyAdmin and Adminer and how to restore the files with the FTP program Filezilla.
Please note: For this tutorial we use a complete WordPress backup created with BackWPup, as all needed files are contained. This is the preferred method for beginners.
Advanced users can also use partial backups. For example, not backing up plugins or themes as they are available in the WordPress.org repositories or stored locally on your computer. You can save some space with this method. This means it can be that you don’t have all the files we are mentioning here.
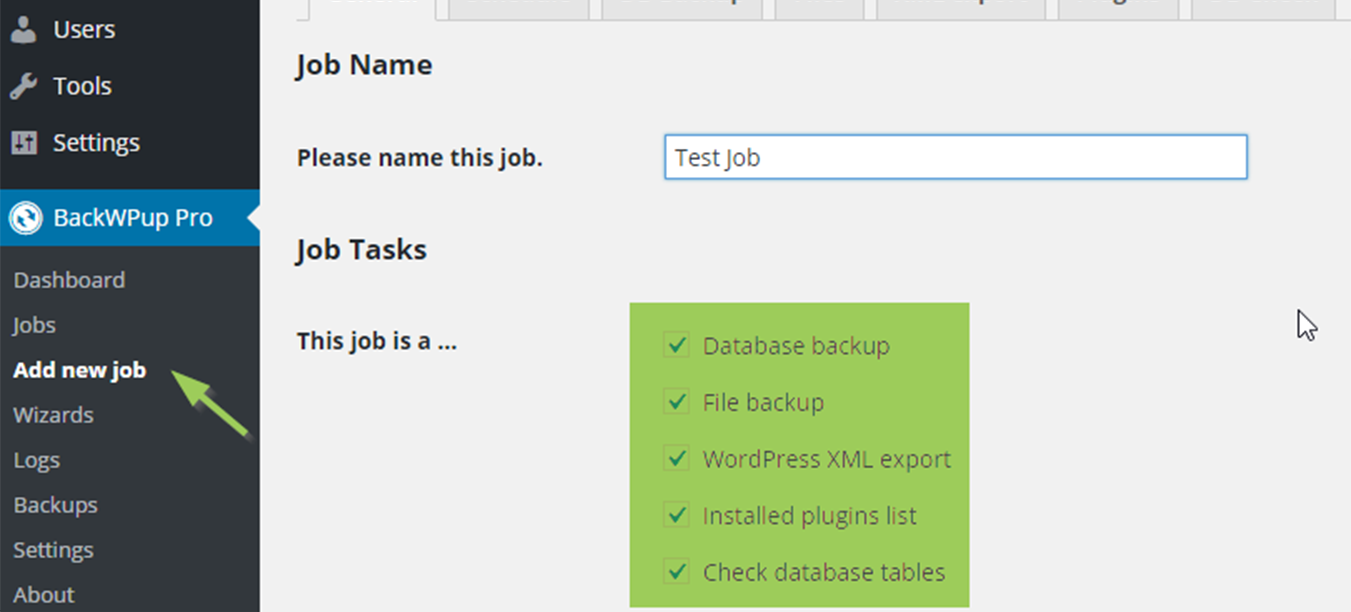
Under BackWPup Pro → Add new job, tab General, we check all job tasks and choose Backup to folder as job destination. The WordPress backup will be stored on the server in your WordPress installation.
The content of the backup archive
Before you start, get the backup archive that you created with BackWPup. Unzip the
archive and take a look at the contents. You will see:
- the database of your WordPress as .sql file. The file may be zipped, depending on the settings of the backup job.
- the file SiteName.pluginlist.<Date>.txt – the list of all installed plugins. This is helpful if you don’t backup the plugin files, so you can easily add the plugins to your WordPress again and don’t forget any.
- the file SiteName.wordpress.<Date>.xml – the backup of the WordPress contents (blog posts, pages, products, etc.) in the XML format. Via the WordPress Importer you can restore the contents. In the admin area, this is located under Tools → Import.
- the file manifest.json – in the future, this file will be used for the automatic restore. You can ignore this file for now.
- the file backwpup_readme.txt – this file contains important information. You should read it before doing a restore.
- the files of your backed up WordPress installation – these need to be copied into the folder of your WordPress installation. See the part Restore the files with FileZilla. All other files mentioned above should not be copied to your server.
Restore the WordPress database from a backup
with phpMyAdmin
phpMyAdmin is a web application which you can use to administrate MySQL databases via a browser. It is offered by many web hosts. You don’t need any MySQL skills to work with it, as the tool has a WYSIWYG interface. If you want to restore a database, follow these steps:
- Log in to phpMyAdmin.
- In the sidebar you can see all current databases. Choose the one you wish to restore. You can find the name of the database of your WordPress in the wp-config.php file, which is located in the main directory of WordPress. Search for the line
define('DB_NAME', 'your_database_name_here'); - If there are any tables in the database that are also in the database backup, they will be overwritten.
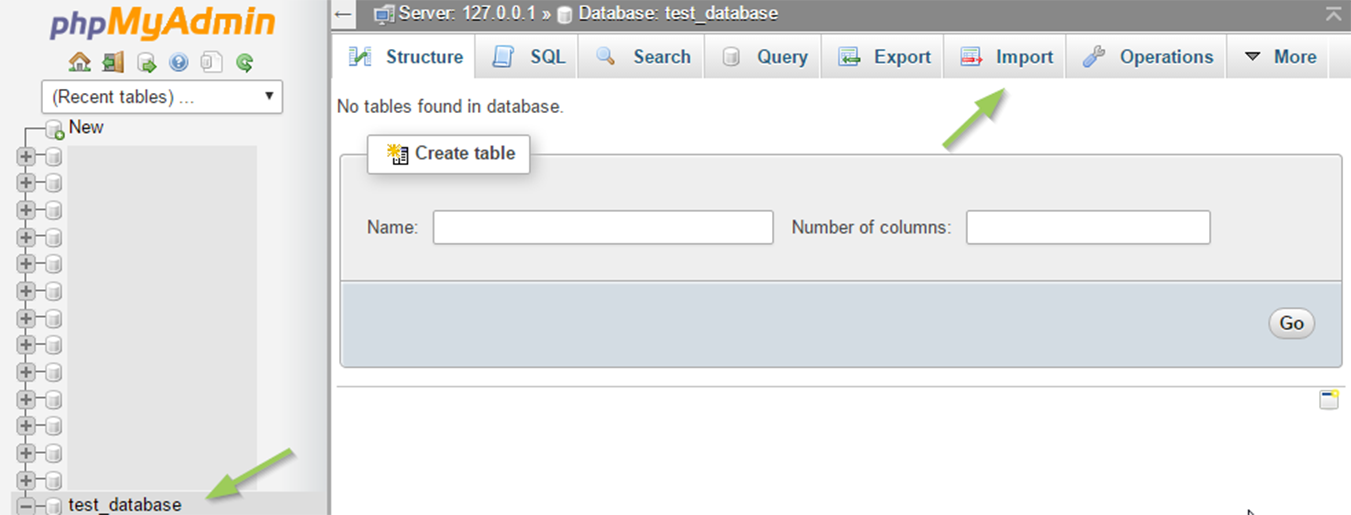
Log in to phpMyAdmin - Go to Import.
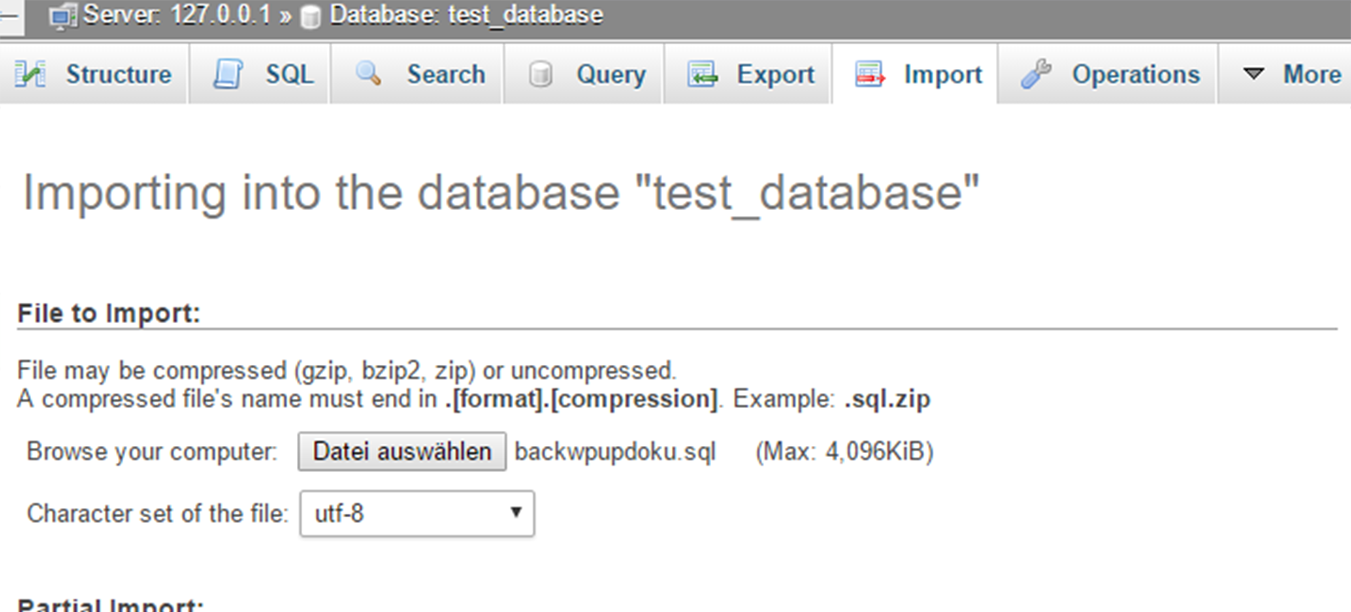
Go to Import. - Select the database .sql file of the BackWPup backup from your computer. It may be a zipped file if it is not a .sql file. phpMyAdmin should automatically set the encoding and database format settings (see screenshot above). The format should match the ending of the database file, it should be SQL. You can check the encoding by opening the unzipped database file in a text editor. Find the line
/*!40101 SET NAMES ... */; - Click the OK button and wait until you get the message that the import was successful.
Some providers only allow importing databases up to a specific size. You’ll get an error message if you try to import a bigger file. Please contact your host or try to import the database with the plugin Adminer, which is described in the following section.
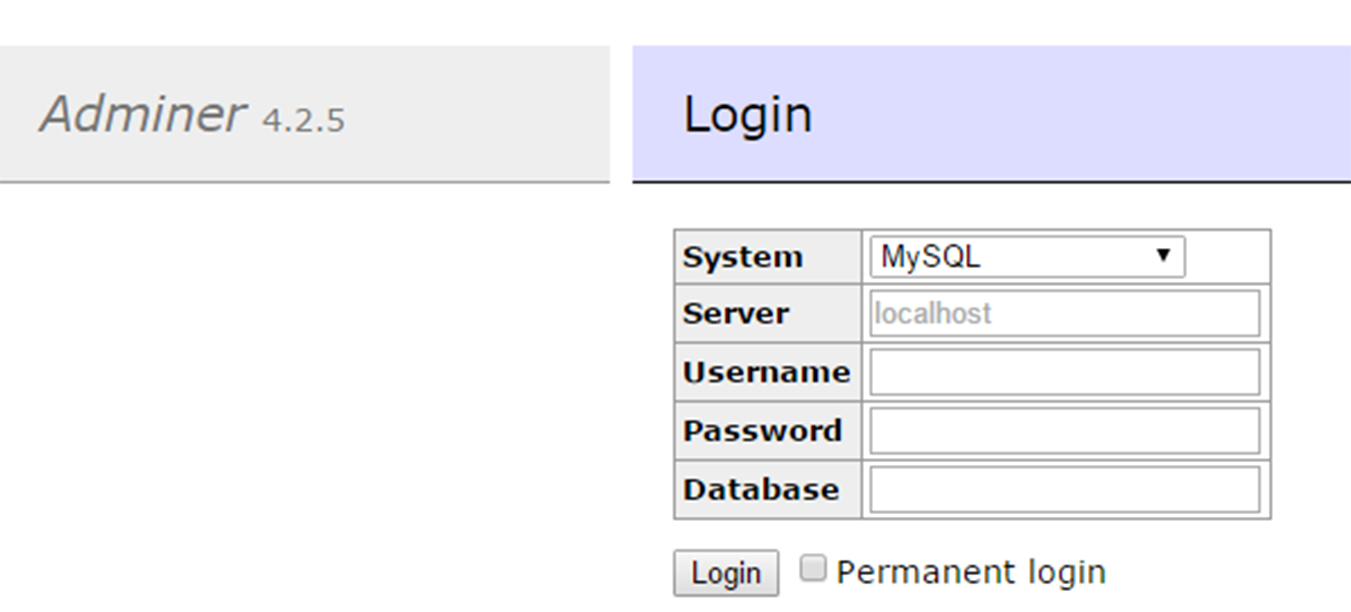
with Adminer
Adminer is similar to phpMyAdmin, it is a free tool you can download here. Upload it to the main folder of your WordPress installation. Adminer comes with just one php file, feel free to rename it to adminer.php for easier use.
- Open the uploaded Adminer file, for example yourdomain.com/adminer.php in your browser. You’ll see a form where you need to fill in the database credentials. You can find these in the wp-config.php file of your WordPress or you can get them from your host.
- Log in with the credentials. You’ll now get a screen similar to phpMyAdmin. The workflow is also similar to phpMyAdmin.
- If there are any tables in the database which are also in the database backup file, these will be overwritten by the import.
- Go to Import.
Go to Import Adminer - Select the database .sql file of the BackWPup backup from your computer. It may be a zipped file if it is not a .sql file. Once you selected the file, click on Execute. Instead of uploading the file via Adminer, you can upload it via FTP in the same folder of the adminer.php file. Rename the database backup file to adminer.sql.gz. With a click on Run file the import of this file is started.
Run file the import - Wait until you get the message that the import was successful.
If your host does not allow the use of Adminer, you can give the plugin Adminer for WordPress a try. You can install it via the WordPress admin area and access it via the menü Ari Adminer.
Restore the WordPress files with FileZilla from a backup
Please note: For restoring the WordPress files with FileZilla, it is not relevant where you have saved your backup to. It can be Amazon, Google Drive, on a FTP server or any other destination: get the backup archive from there and unzip it to get the WordPress files (see section Contents of the backup archive) before you continue with the tutorial.
Restoring the WordPress files is simply copying the files from your backup to the folder of your WordPress installation via a FTP client like FileZilla. Follow these steps:
- Install the FTP client FileZilla on your computer if you don’t have such a program. You can find the download here. You don’t need to download the FileZilla Server, only the client.
- Get the credentials for your FTP access. If you don’t know them, please contact your host.
- In FileZilla, go to File → Site Manager, add a New Site and add your credentials.
- To open a connection to your web server, click on Connect.
- After the successful connection, you can see the files on your computer on the left and the files on your web server on the right.
- On the left side, navigate to the folder of your BackWPup backup. On the right side, navigate to the folder of your WordPress installation.
- Select all files on the left side that you want to upload.
Please note: Only upload the WordPress files, NOT: the database, the file SiteName.pluginlist.<Date>.txt, the file SiteName.wordpress.<Date>.xml, the file manifest.json and the file backwpup_readme.txt.
- With a right click on the selection a context menu opens, where you can start the upload. It can take up to a few minutes, depending on how big the files are. You can see the progress and possible errors in the bottom area of the FileZilla window.
Please note: Files, which are not backed up by BackWPup (depending on your settings), need to be uploaded additionally. Missing plugins and themes can be re-added via the WordPress backend afterwards. If you chose the option for excluding thumbnails in backups, you need to regenerate them again. For this, you can use the plugin Regenerate Thumbnails.