
Table of Contents
Backing up your WordPress website is crucial for securing your data. With BackWPup, you can easily and automatically back up your WordPress files and database. Whether you need a full backup or just specific sections, the process is simple, thanks to the new, user-friendly interface.
Table of Contents
Getting Started: Set Up Your First Backup
Once you’ve installed BackWPup, head to the onboarding page to set up your first backup. The process is divided into three straightforward steps:
Step 1: What to Backup?
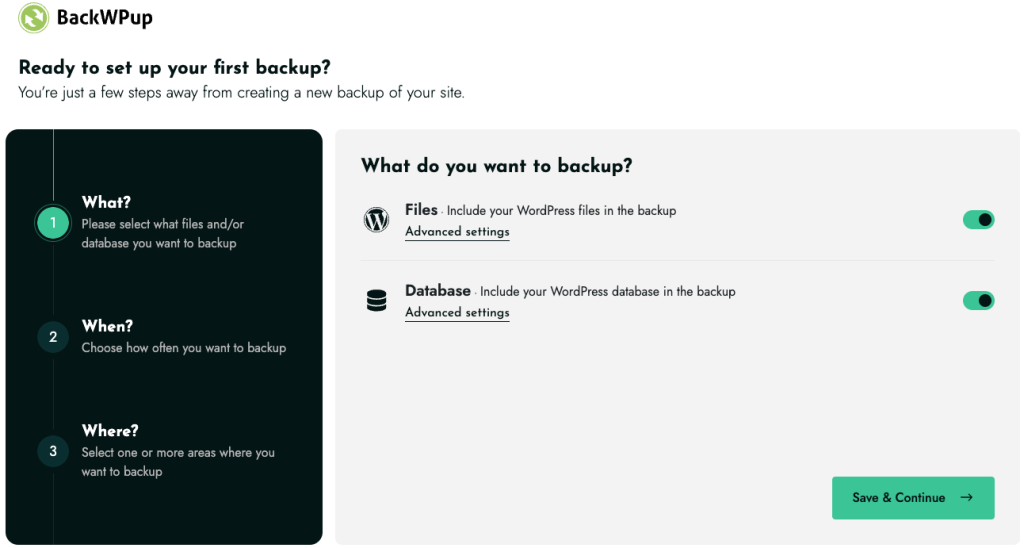
First, decide what parts of your site you need to backup:
- Files: Select this option to back up all your WordPress files, including your themes, plugins, and uploads. You can click on ‘Advanced Settings’ to choose specific files or directories you either want to include or exclude from the backup.
- Database: This includes all your WordPress database tables. Use ‘Advanced Settings’ here as well if you need to exclude certain tables or customize what gets backed up.
Step 2: When to Backup?
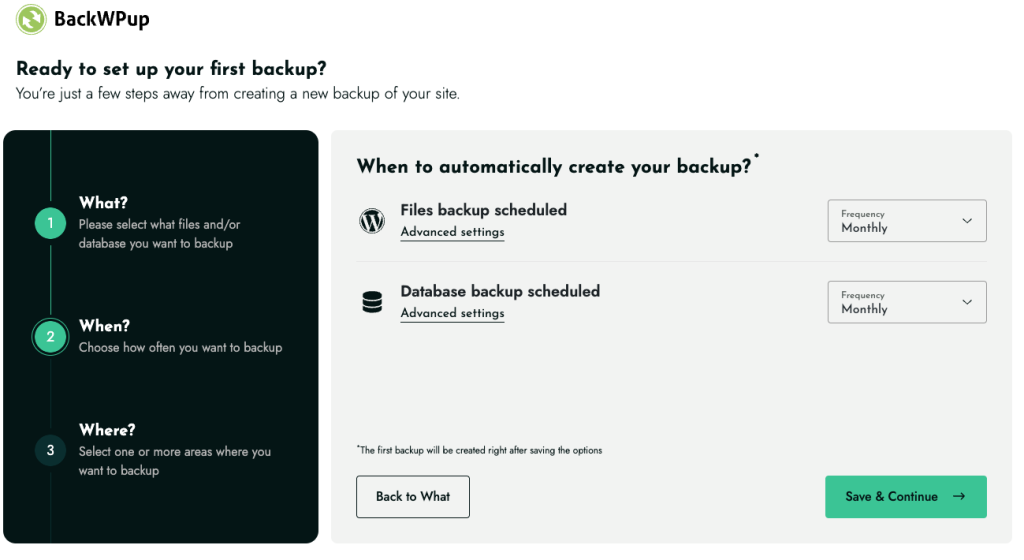
Choose how often you want your backups to run. You can set different schedules for your files and your database:
- Backup Frequency: Select how often each backup should occur—hourly, daily, weekly, or monthly.
In the ‘Advanced settings,’ you can fine-tune the schedule if you need backups to happen at specific times. This helps ensure that your backups are always up-to-date, and they’re done automatically using WP-Cron, so you don’t have to worry about manually starting them.
Step 3: Where to Store Your Backup?
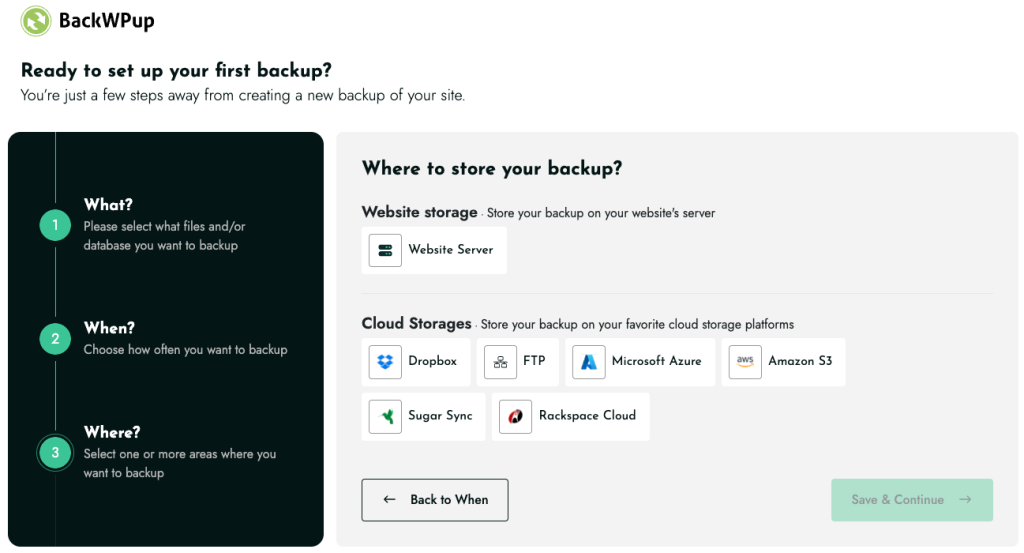
Choose the storage location for your backups to ensure your data is safe:
- Website Storage: Store the backup files directly on your server for easy access.
- Cloud Storage: You can select from several cloud storage services like Dropbox, Amazon S3, Microsoft Azure, and more. This provides an offsite storage solution that adds an extra layer of security.
After setting your preferences, click Save & Continue to initiate your first backup immediately.
Managing Your Backups
Once your setup is complete, you can manage all your backups directly from the BackWPup settings. Here’s how each action works:
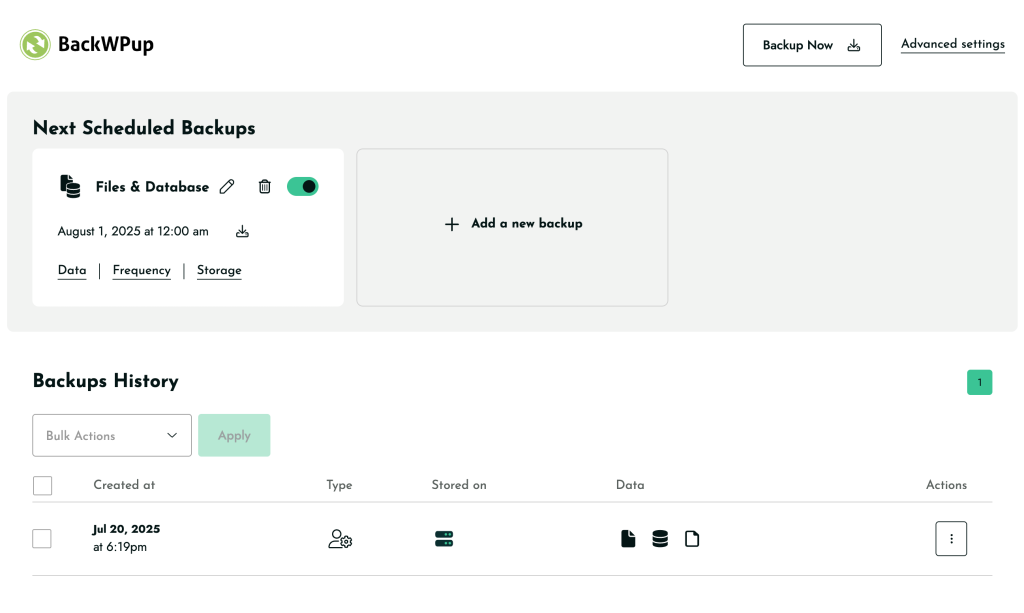
Files & Database Backup:
Whenever you create a new backup using the + Add a new backup button, a combined Files & Database backup is added by default. This backup includes both your site files and database.
To customize it, click on the Data option on the backup card. This opens the Data Settings panel, where you can:
-
Select or deselect Files and Database based on what you want to back up.
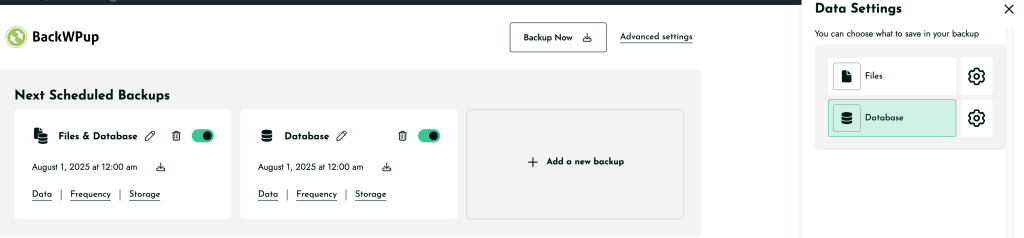
-
Configure specific settings for each selected data type using the gear icon next to it.
If both Files and Database are selected, the backup icon changes to a combined symbol to reflect this.
Edit Backup Name:
Click the pencil icon to rename the backup for easier identification.
Delete Backup:
Click the trash icon to remove any scheduled backup you no longer need.
Toggle Schedule On/Off:
Use the switch on the backup card to enable or disable the schedule without deleting the backup job.
Adjust Schedule Settings:
Click Frequency to set or modify how often the backup runs. You can choose hourly, daily, weekly, or monthly and select the exact day and time based on your needs.
Manage Storage Settings:
Click Storage to define where your backups will be saved.
Manual Backup
There are two ways to manually trigger a backup:
-
The Backup Now button at the top of the page lets you manually run a complete backup (Files and Database together). This backup is stored on your site’s server, allowing you to download it to your computer whenever needed. It’s particularly useful for making sure your data is safe before implementing any significant changes to your site.
-
Each scheduled Files or Database backup shows a small backup icon next to it. Clicking this icon immediately triggers a manual backup for that specific backup setup, using the same data selection and storage location that you have configured for that schedule.

This method is different from the main “Backup Now” button at the top of the page, which saves the backup only to the local server regardless of the selected storage. Using the per-job backup icon ensures the backup follows your configured external storage settings (like Dropbox, Amazon S3, etc.).
Backup History
-
This section displays a list of all existing backups, including details like the creation time, backup type, storage location, and the data covered.
-
Actions for Each Backup:
-
Download: Save a backup locally.
-
Restore Full Backup: Revert your site to the exact state it was when the backup was taken.
-
Delete: Remove the backup from your storage destination.
-
This streamlined interface ensures that managing your backups is straightforward, keeping your data secure and accessible whenever needed.
