Create & Schedule Automatic Backups with BackWPup
Automatic backups are types of data backups that occur with little to no human intervention. It backs up and stores data to a set destination at a scheduled time.
This type of backup process saves a lot of the time and energy it takes to maintain a website. It also gives another layer of security to the site.
In this article, we will talk about two different methods to create and schedule automatic backups on your WordPress website. Let’s get to it!
Setting up an automatic backup with BackWPup
Thanks to a wide range of backup plugin options, setting up an automatic backup on WordPress now can be done in just a few clicks.
In this section, we will explain how to set up an automatic backup job with one of the best WordPress backup plugins, BackWPup.
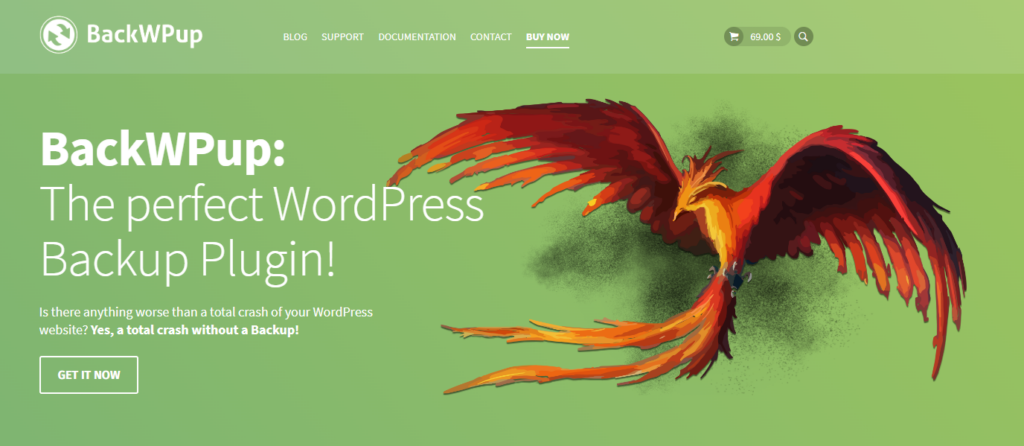
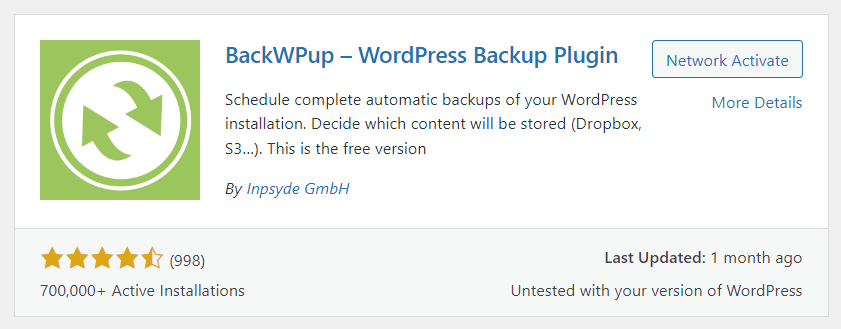
BackWPup is a freemium WordPress plugin that offers many great backup features for your website. It has around 12 million downloads and 700,000 active installations.
The wide variety of backup storage options and various file formats makes BackWPup one of the best WordPress backup plugins on the market right now.
What’s more, this plugin can run scheduled or manual WordPress backups while simultaneously checking and optimizing the site’s database files.
The free version of BackWPup offers enough features to get a backup job running and secure all of your website data.
However, to restore website data automatically, you will need to purchase the BackWPup Pro license, priced at $69/per year.
Luckily, you can use the free version to create and schedule automatic backups for your website! Follow these simple steps:
Step #1: Install the BackWPup plugin
The first thing you need to do is Install and Activate the BackWPup plugin from the official WordPress theme directory.
Upon activation, the plugin will display a welcome page. In addition, the BackWPup menu will be added to the WordPress admin sidebar.
Step #2: Create backup jobs
Once the plugin is installed, head over to the menu settings and click Add New Job.
Under the General tab, give the backup job a name. This name will be used internally and will help you identify each job on the website.

Select the type of backup tasks to perform under the Job Task option. Available options include database backup, file backup, WordPress XML Export, and a list of installed plugins.
Should you also want to optimize and check the database file while doing the backup jobs, tick the Check database tables option.

Next, give the job a name and select the Archive format type. The default option is Zip, but you can also choose a Tar Gzip or Tar archive.
Finally, pick where the backup files should be stored in the Destination Job section. BackWPup provides multiple options for this.
Users can store backup files on their server, send them via email, back up to FTP, back up to Dropbox, to Amazon S3, and many more.
Once everything’s set, press the Save Changes button, and you’ve successfully created backup jobs to run at any time!
Step #3: Schedule automatic backups
Now that the backup jobs are ready, this section will show you how to schedule and run these jobs automatically on the website.
On the BackWPup setting page, go to the Schedule tab. There will be multiple options to start the job. To set an automatic backup, check the Activate Scheduling option.
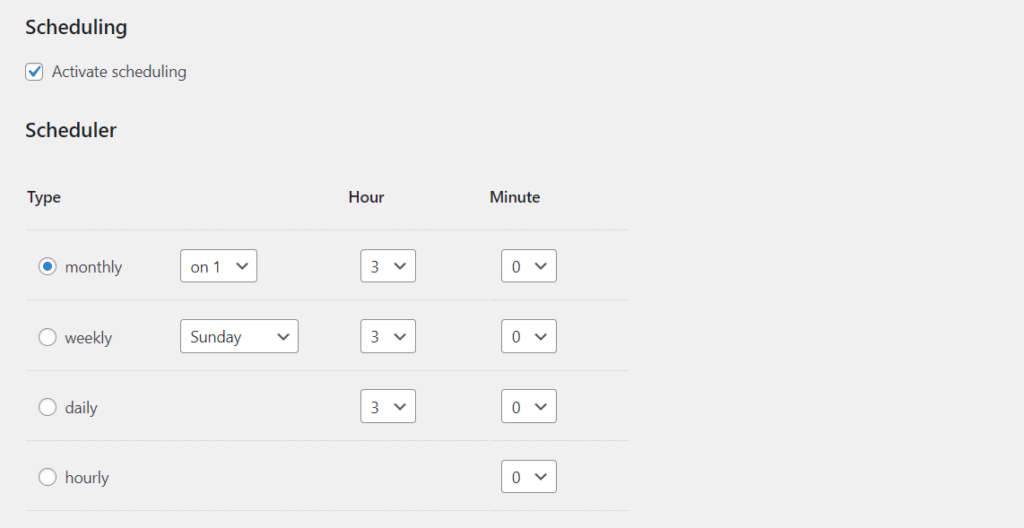
The WordPress cron allows you to run automatic backups every month, week, day, or even hour. You also get to choose the date and the day of the backup.
What’s more, this option also comes with an advanced scheduler that lets you schedule automatic backups on the website all year round.
You only have to schedule these backup jobs once, and BackWPup will take care of the rest!
For advanced users, BackWPup also offers more scheduling options, such as using a URL to start external work or using WP-CLI, the command-line interface for WordPress.
However, we highly recommend using the daily or weekly backup schedules by selecting the Cron WordPress option, as it is the safest and easiest option!
Important files to back up
On WordPress, website backups usually consist of content and database files. To choose which site content to back up, go to the Files tab on the BackWPup menu setting.
There, you can select WordPress folders you want to back up. Starting from installation, content, plugins, themes, and the media uploaded to the site.
You can also manually input and exclude extra folders to back up or ignore via the meta boxes provided by the BackWPup plugin.
To learn how to create a backup of the site’s database files, check out our WordPress Database Backup Guide.
Automatic backup with cPanel
cPanel is one of the most popular control panels for website and server management. It turns standalone servers into a simplified point-and-click platform.
Many web hosting providers offer this control panel as part of their hosting packages. However, cPanel is also available for other uses, from personal to enterprise.
This control panel comes with two interfaces, a user interface called the cPanel and a server management interface called the Web Host Manager (WHM).
This combination allows users to manage their websites and supplies hosting providers with tools to manage the server.
In cPanel, there are two automatic backup options users can choose from automatic full account backup and automatic home directory backup.
The following is a brief explanation of the two options and how to activate them:
- Automatic full account backup — this feature downloads website data as a whole, starting from the home directory, database, email account, and Domain Name Server (DNS) settings.
- Automatic home directory backup — this feature downloads the home directory website data. In most cases, the downloaded files are website files and emails.
Automatic full account backup
To automatically back up the entire website data with cPanel, take these steps:
- Login to the cPanel control panel on your hosting account or web server.
- Find and open the Backup menu under the Files section.
- On the next page, click the “Download a Full Account Backup” button.
- Select Home Directory as Backup Destination in the drop-down menu.
- Then, click the Generate Backup button and press Go Back to see if the backup file is ready to download!
That’s it! To start the download process, you just need to click on the generated backup file and the backup will happen automatically.
Automatic home directory backup
Partial backup is a feature of cPanel’s Backup menu that allows users to download important parts of a website. The Home directory is one of them.
Backing up home directory data through this feature is quite easy. You just need to go to cPanel and the Backup menu > Partial Backups.
Then, find and press the Home Directory button. Once you do that, the backup download process will start immediately.
Wrapping up!
Having an automatic backup setup ensures that the most recent copy of your website is always stored safely in case of an emergency.
That way, when something goes wrong with your website, you can easily restore the site to its earlier version and avoid prolonged downtime.