
Check out the benefits of a WordPress Backup to Google Drive.
Backing up your WordPress site to Google Drive with BackWPup ensures your data is securely saved off-site. Below is a detailed guide to help you set up this process effectively.
Setting Up Google Drive Authentication for BackWPup:
- Melden Sie sich bei Ihrem Google-Konto an und rufen Sie die Google Cloud Console auf.
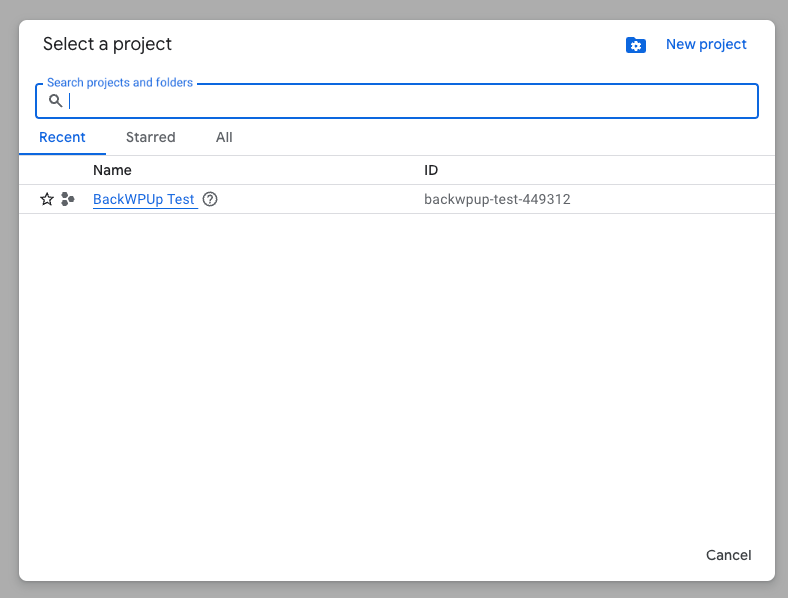
- Erstellen Sie ein neues Projekt und wählen Sie es aus, sobald es erstellt ist.
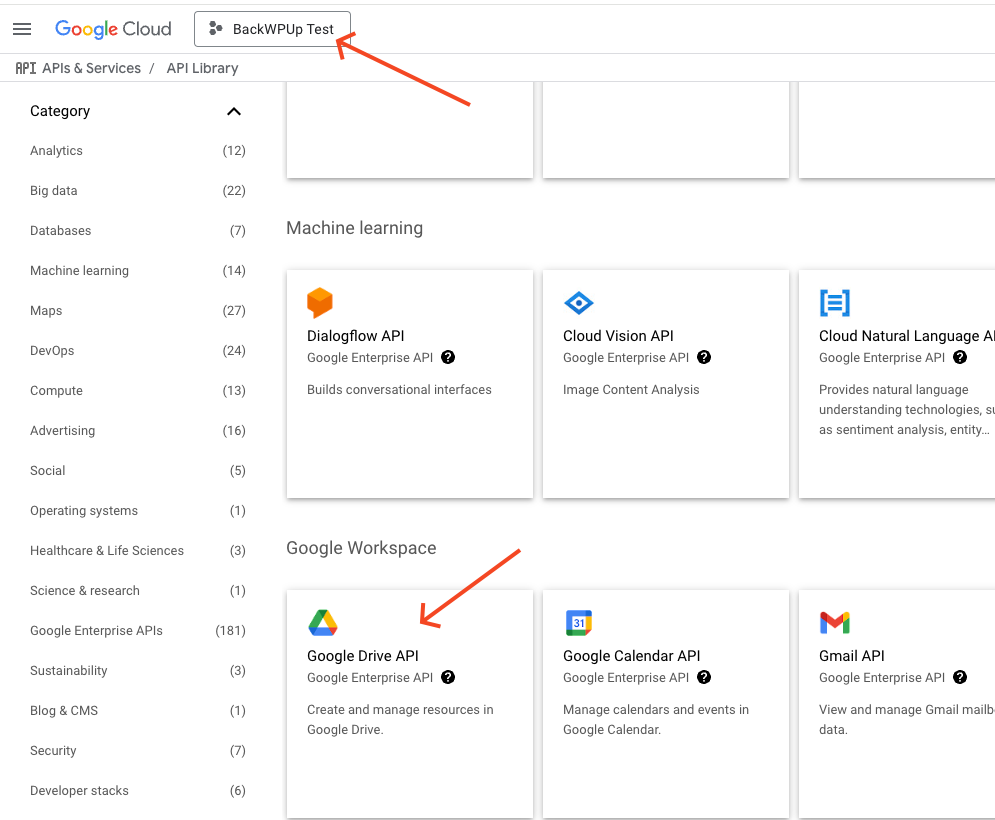
- Search for the Google Drive API in the library and enable it for your project.
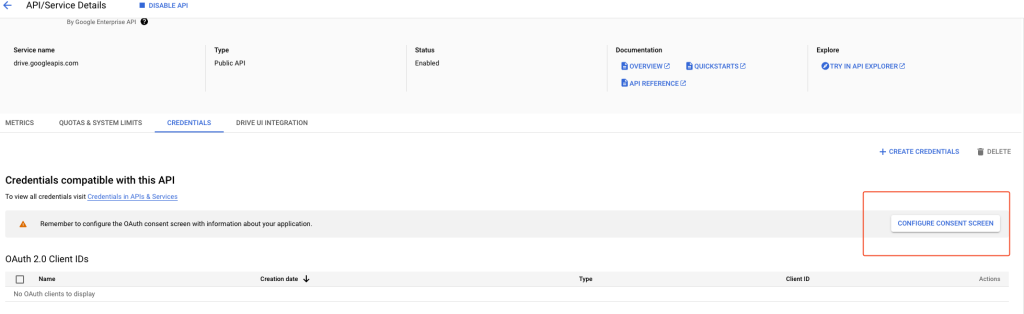
- Klicken Sie in der Seitenleiste auf „Anmeldedaten“. Wenn eine Konfiguration des Einwilligungsbildschirms erforderlich ist, weil diese noch nicht vorgenommen wurde, klicken Sie auf „Einwilligungsbildschirm konfigurieren“.
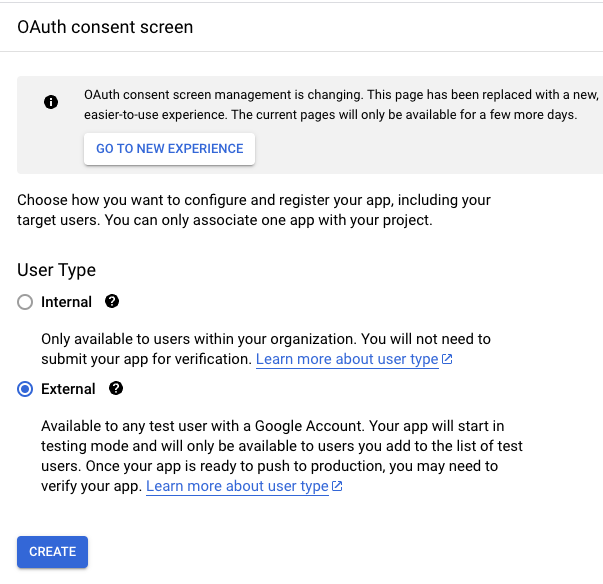
- Wählen Sie auf dem nächsten Bildschirm die Option „Extern“ aus.
- Geben Sie schließlich auf dem nächsten Bildschirm unten einen Anwendungsnamen, Ihr Google-Konto für den E-Mail-Support und Ihre E-Mail-Adresse als Entwicklerkontakt an.
- Schließen Sie den Vorgang ab, indem Sie auf den folgenden Bildschirmen auf die Schaltfläche „Speichern“ klicken, bis Sie wieder zum Dashboard gelangen.
- Nach diesen Einstellungen ist die Authentifizierung standardmäßig im Testmodus aktiviert. Um die App in den Produktionsmodus zu versetzen, wenn Sie sie in der Produktion nutzen möchten, wählen Sie im linken Menü den Link zum OAuth-Genehmigungsbildschirm aus und klicken Sie auf „App veröffentlichen“.
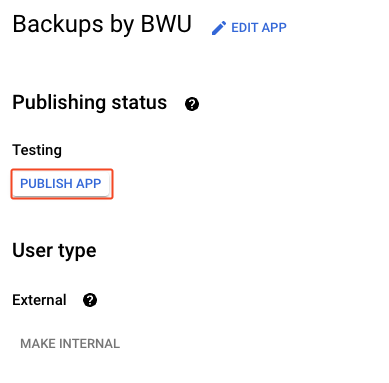
- Working in test mode restricts access to Google Drive, making the authentication process more limited.
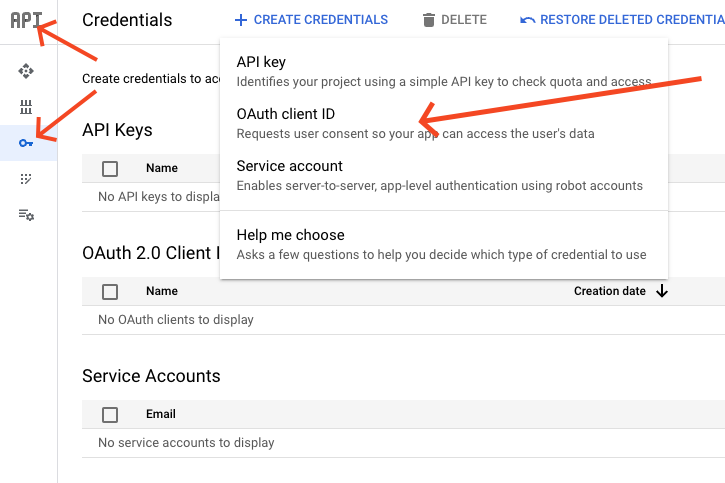
- Sobald der Einwilligungsbildschirm eingerichtet ist, klicken Sie im Haupt-Dashboard auf den Link „Anmeldedaten“ und anschließend auf den Link „+ Anmeldedaten erstellen“ und wählen Sie „OAuth-Client-ID“ aus. Sie werden auf eine neue Seite weitergeleitet.
- Wählen Sie unter „Anwendungstyp“ die Option „Webanwendung“ aus und geben Sie einen Namen für die Webanwendung ein. Lassen Sie das Feld „Autorisierte JavaScript-Quellen“ leer.
- In your WordPress admin area, go to storage options and select Google Drive, and go to the Google API Keys section.
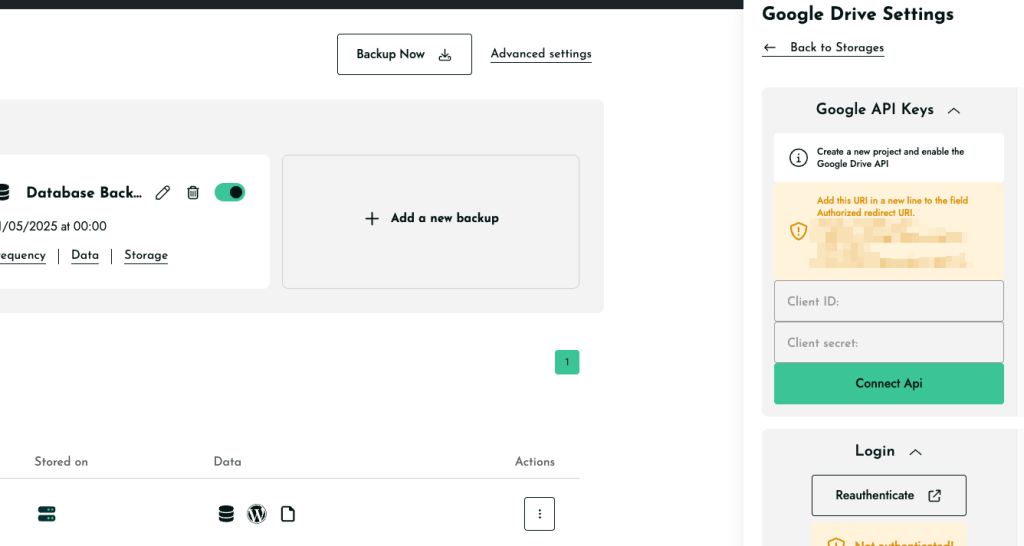
- Copy the displayed URL under Redirect URIs and paste it into the Authorized redirect URI field in the Google Drive form.
- Klicken Sie anschließend auf „Erstellen“.
- Anschließend wird der Client erstellt, und Ihnen werden die Client-ID und der Client-Secret angezeigt.
- Copy the Google Drive Client ID and Secret and paste them into the BackWPup backend in the field Client ID and Client Secret. Then, save the BackWPup settings.
- Wechseln Sie nun zur Registerkarte „Anmelden“.
- You are redirected to Google and have to allow BackWPup access to Google Drive. Click on Allow.
- After this, you will be redirected to your WordPress admin area, where you should see the successful authentication.
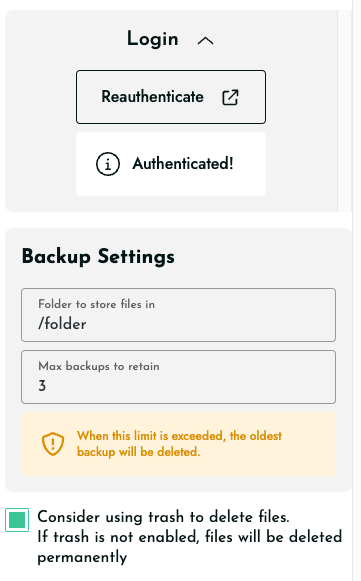
- On the settings page, there are some more options: Folder in Google Drive (name of the folder where all backups will be stored), File Deletion (the maximum number of backups to be stored, with older backups being deleted), and a checkbox below File Deletion that pushes the old backups to the Google Drive trash instead of deleting them immediately.
- Test the correct Google Drive authentication by starting a backup job with this destination. You should now see your backup on Google Drive if it was successful.
