
Check out the benefits of a WordPress Backup to Google Drive.
Backing up your WordPress site to Google Drive with BackWPup ensures your data is securely saved off-site. Below is a detailed guide to help you set up this process effectively.
Setting Up Google Drive Authentication for BackWPup:
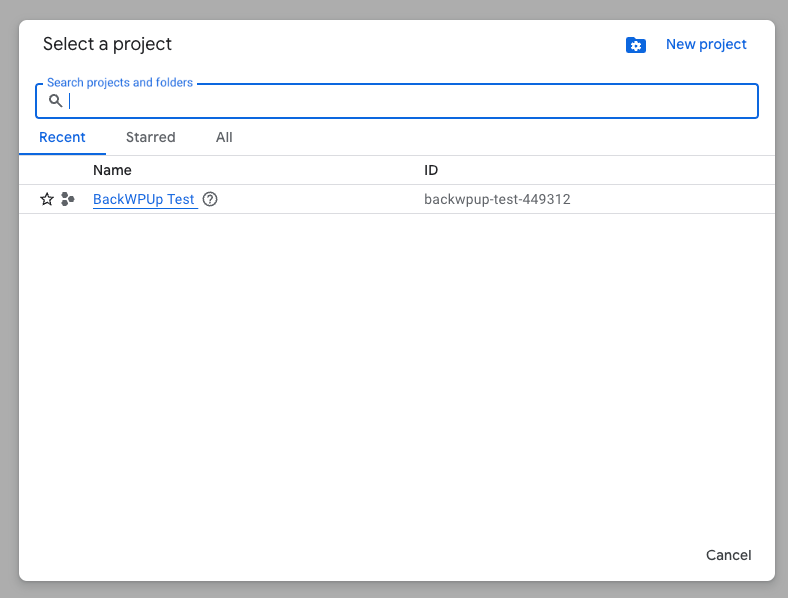
- Log into your Google account and navigate to the Google Cloud Console.
- Create a new project and select it once it’s created.
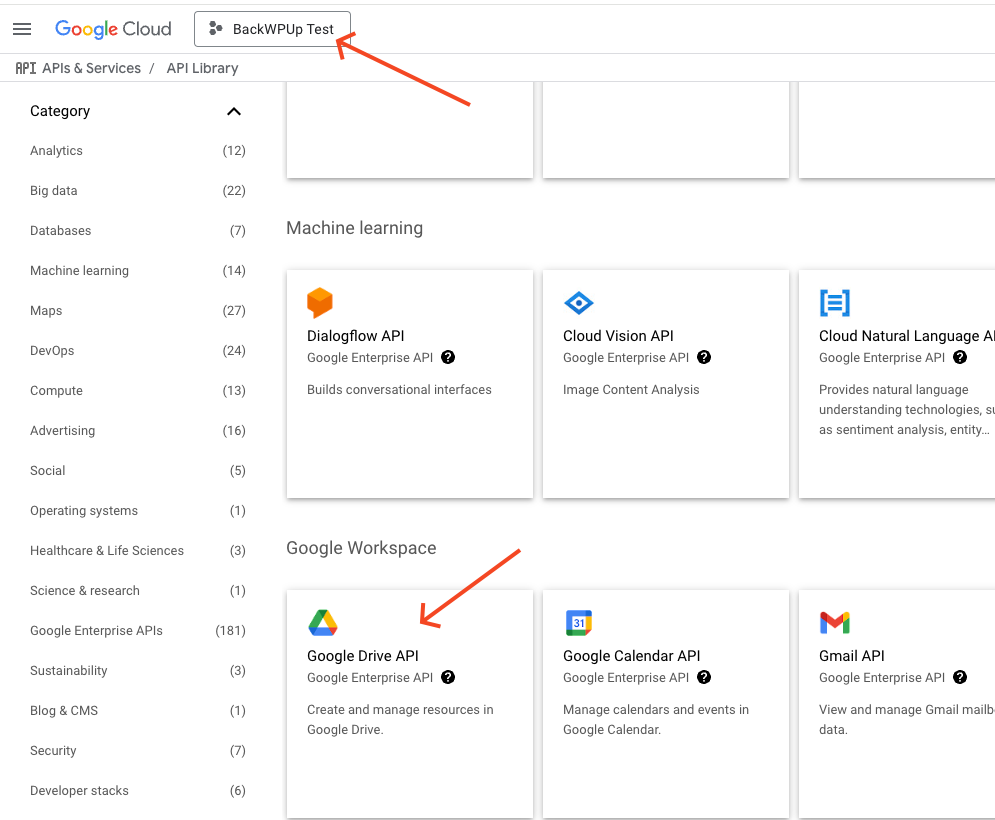
- Search for the Google Drive API in the library and enable it for your project.
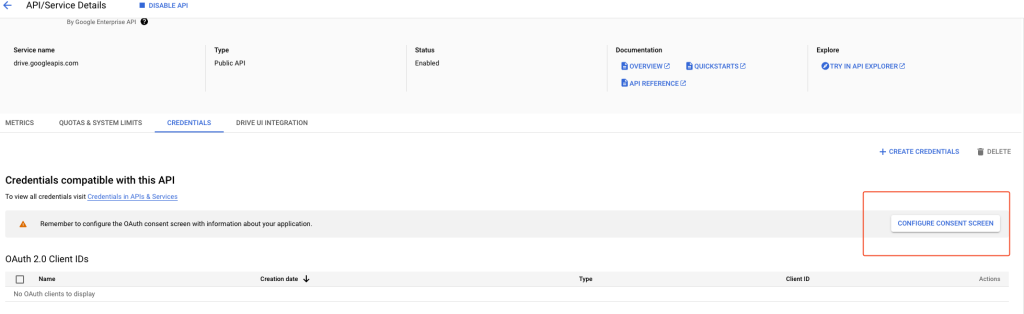
- Click on Credentials in the sidebar. If a consent screen configuration is requested because it has not been set before, click CONFIGURE CONSENT SCREEN.
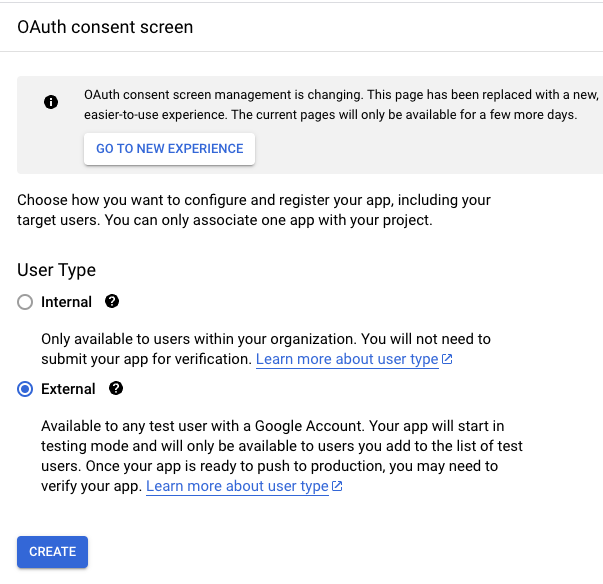
- On the next screen, select the External option.
- Finally, set an application name, your Google account for email support, and your email address at the bottom for Developer contact in the next screen.
- Complete the process by pressing the Save button on the following screens until you get back to the Dashboard.
- After these settings, authentication is set in test mode by default. To put it to production when you need to use the app in production mode, select the link to the OAuth approval screen in the left menu and click PUBLISH APP.
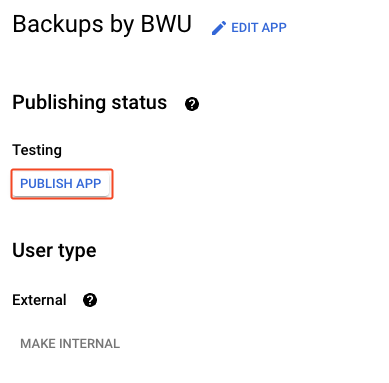
- Working in test mode restricts access to Google Drive, making the authentication process more limited.
- Once the consent screen is set, click on the Credentials link in the main dashboard and then click on the + CREATE LOGIN DATA link and select OAuth Client ID. You will be redirected to a new page.
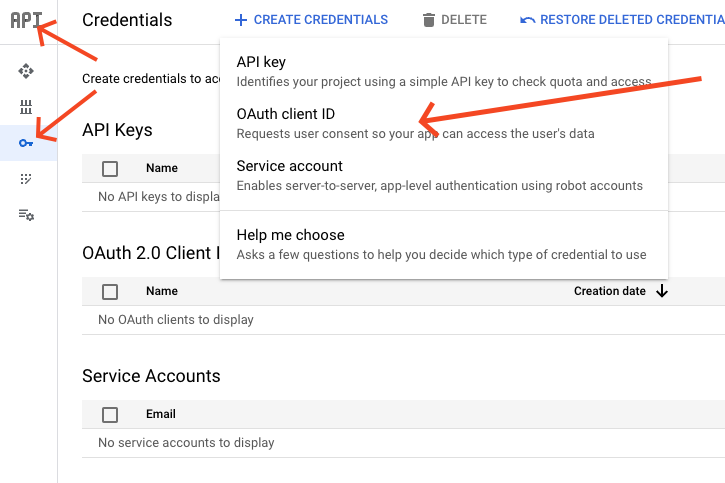
- Under Application Type, select Web Application and enter a name for the web application. Leave the Authorized JavaScript Sources field empty.
- In your WordPress admin area, go to storage options and select Google Drive, and go to the Google API Keys section.
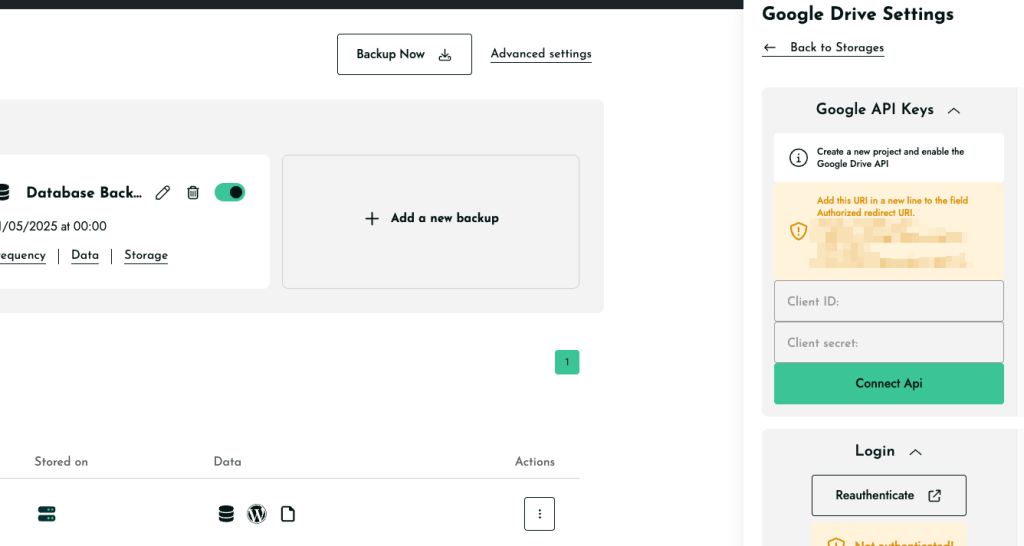
- Copy the displayed URL under Redirect URIs and paste it into the Authorized redirect URI field in the Google Drive form.
- Then click on Create.
- After that, the client will be created, and you will be shown the client ID and client secret.
- Copy the Google Drive Client ID and Secret and paste them into the BackWPup backend in the field Client ID and Client Secret. Then, save the BackWPup settings.
- Now go to the login tab.
- You are redirected to Google and have to allow BackWPup access to Google Drive. Click on Allow.
- After this, you will be redirected to your WordPress admin area, where you should see the successful authentication.
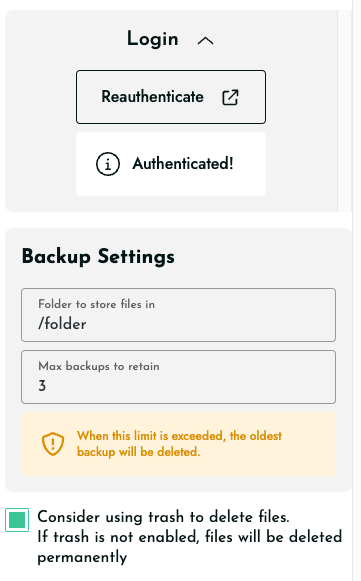
- On the settings page, there are some more options: Folder in Google Drive (name of the folder where all backups will be stored), File Deletion (the maximum number of backups to be stored, with older backups being deleted), and a checkbox below File Deletion that pushes the old backups to the Google Drive trash instead of deleting them immediately.
- Test the correct Google Drive authentication by starting a backup job with this destination. You should now see your backup on Google Drive if it was successful.
