
Check out the benefits of a WordPress Backup to Google Drive.
Backing up your WordPress site to Google Drive with BackWPup ensures your data is securely saved off-site. Below is a detailed guide to help you set up this process effectively.
Setting Up Google Drive Authentication for BackWPup:
- Connectez-vous à votre compte Google et accédez à la console Google Cloud.
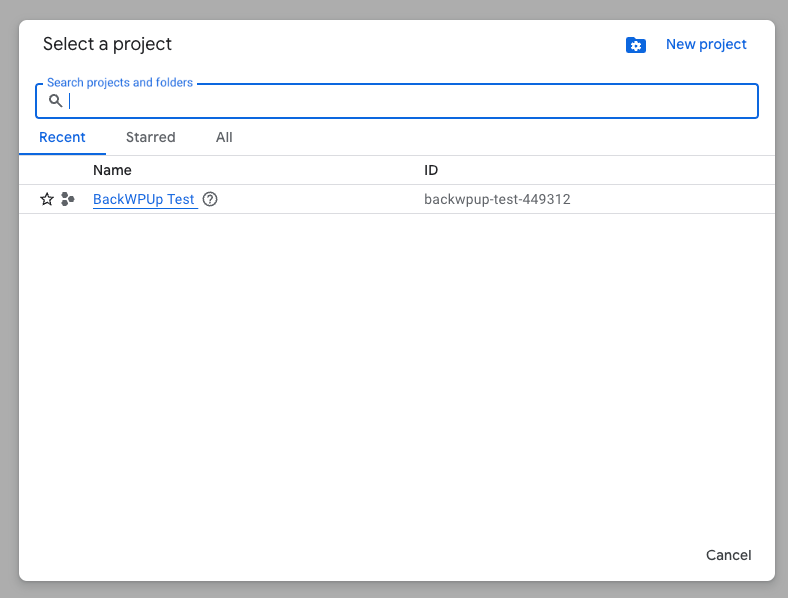
- Créez un nouveau projet et sélectionnez-le une fois qu'il a été créé.
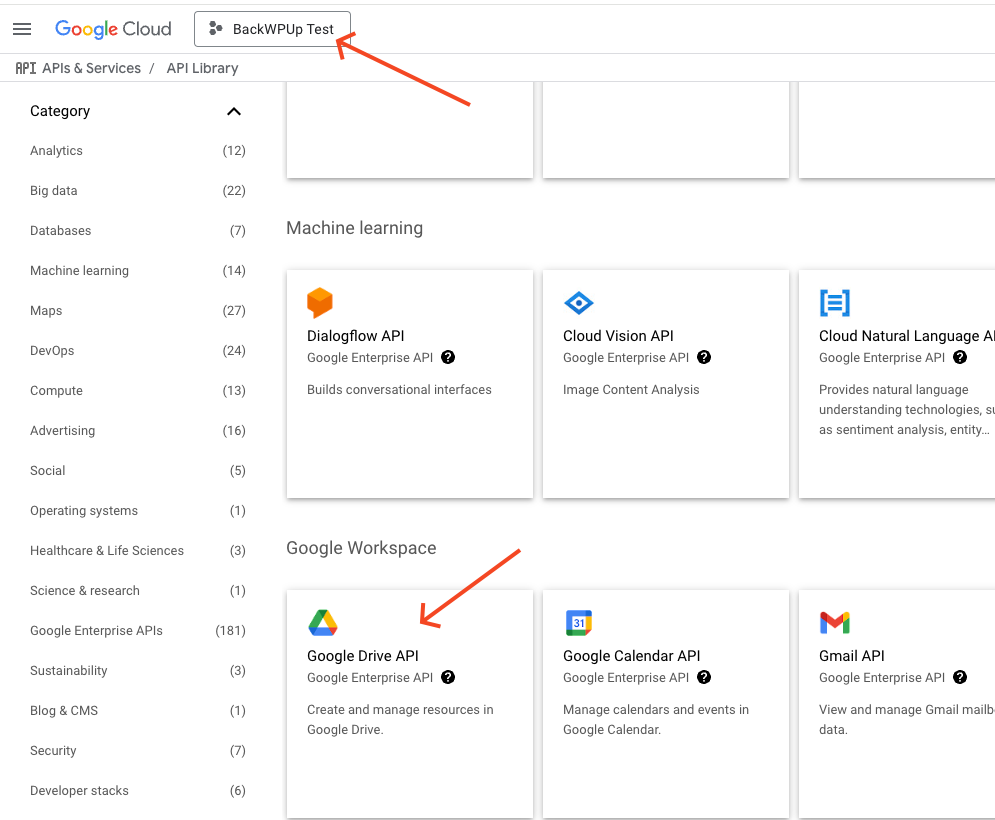
- Search for the Google Drive API in the library and enable it for your project.
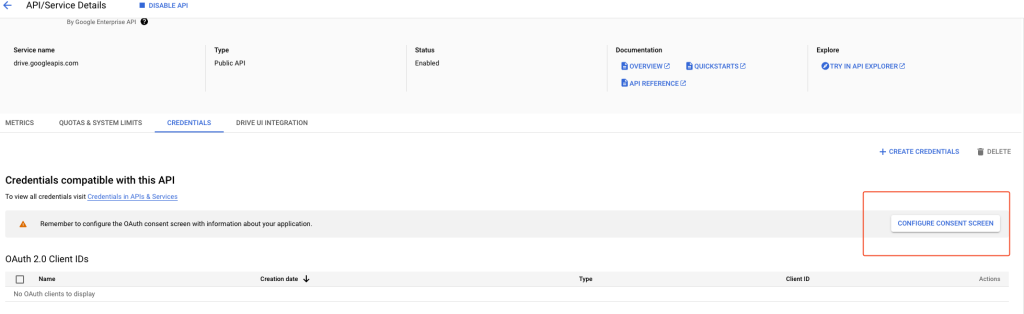
- Cliquez sur « Identifiants » dans la barre latérale. Si la configuration de l'écran de consentement vous est demandée parce qu'elle n'a pas encore été définie, cliquez sur « CONFIGURER L'ÉCRAN DE CONSENTEMENT ».
- Sur l'écran suivant, sélectionnez l'option « Externe ».
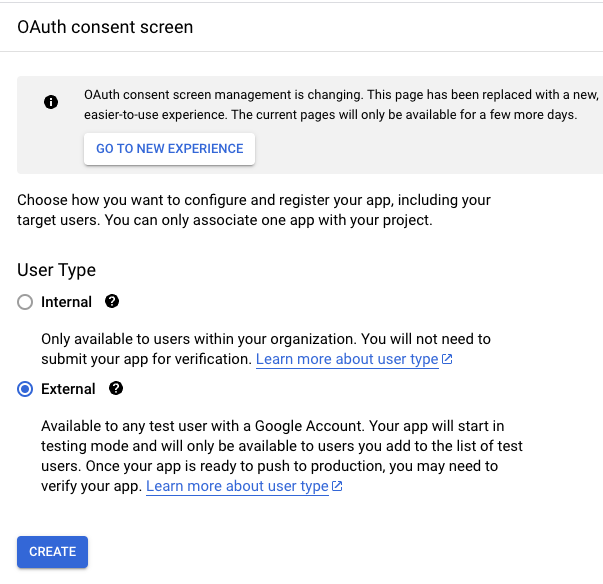
- Enfin, sur l'écran suivant, indiquez un nom pour l'application, votre compte Google pour l'assistance par e-mail et votre adresse e-mail dans la section « Coordonnées du développeur » en bas de la page.
- Terminez la procédure en cliquant sur le bouton « Enregistrer » sur les écrans suivants jusqu'à ce que vous reveniez au tableau de bord.
- Une fois ces paramètres configurés, l'authentification est activée par défaut en mode test. Pour passer en mode production lorsque vous devez utiliser l'application en production, sélectionnez le lien vers l'écran d'autorisation OAuth dans le menu de gauche, puis cliquez sur PUBLIER L'APPLICATION.
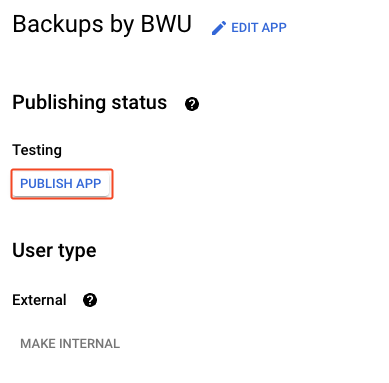
- Working in test mode restricts access to Google Drive, making the authentication process more limited.
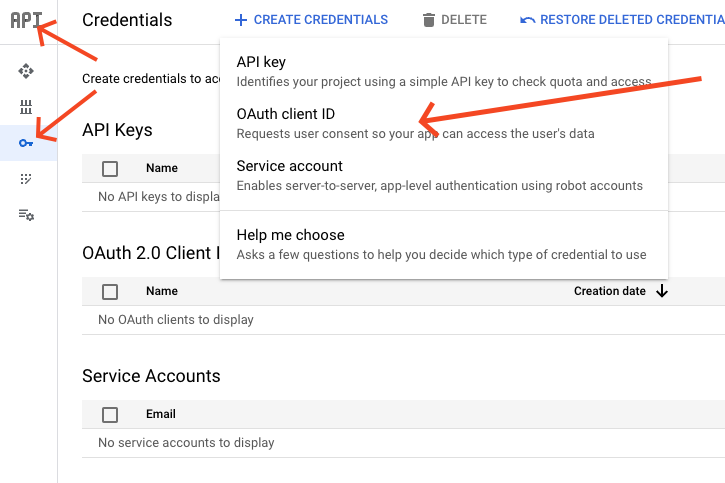
- Une fois l'écran de consentement configuré, cliquez sur le lien « Identifiants » dans le tableau de bord principal, puis sur le lien « + CRÉER DES DONNÉES DE CONNEXION » et sélectionnez « ID client OAuth ». Vous serez redirigé vers une nouvelle page.
- Dans la section « Type d'application », sélectionnez « Application Web » et saisissez un nom pour l'application Web. Laissez le champ « Sources JavaScript autorisées » vide.
- In your WordPress admin area, go to storage options and select Google Drive, and go to the Google API Keys section.
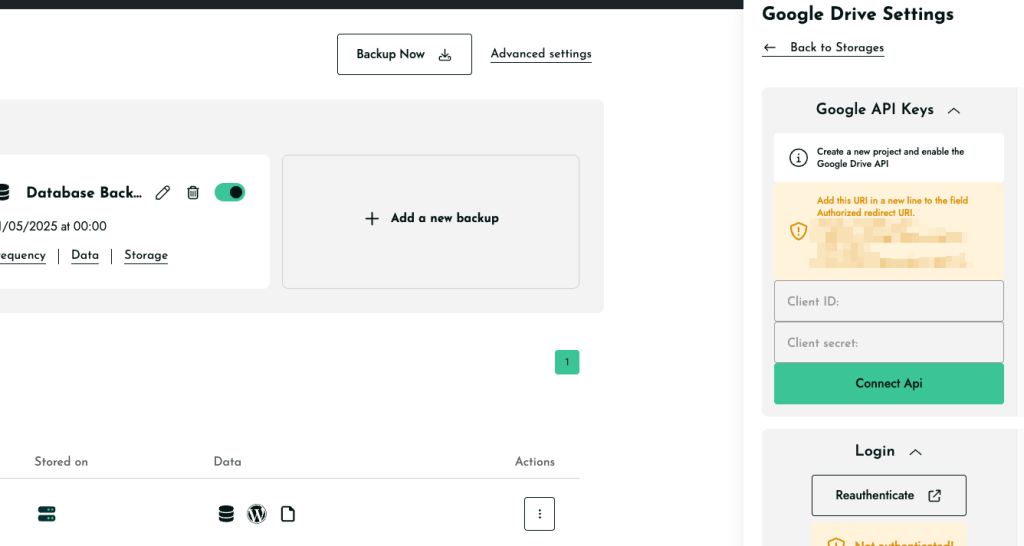
- Copy the displayed URL under Redirect URIs and paste it into the Authorized redirect URI field in the Google Drive form.
- Cliquez ensuite sur Créer.
- Une fois cette opération terminée, le client sera créé et l'ID client ainsi que la clé secrète du client s'afficheront.
- Copy the Google Drive Client ID and Secret and paste them into the BackWPup backend in the field Client ID and Client Secret. Then, save the BackWPup settings.
- Rendez-vous maintenant dans l'onglet « Connexion ».
- You are redirected to Google and have to allow BackWPup access to Google Drive. Click on Allow.
- After this, you will be redirected to your WordPress admin area, where you should see the successful authentication.
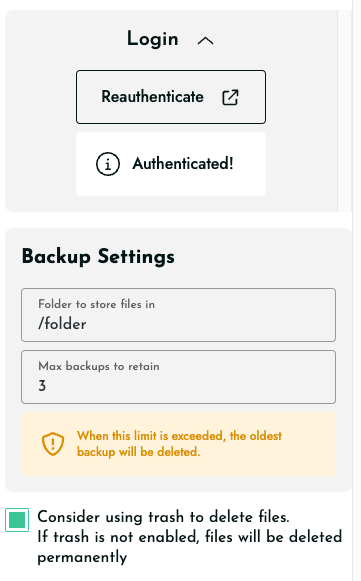
- On the settings page, there are some more options: Folder in Google Drive (name of the folder where all backups will be stored), File Deletion (the maximum number of backups to be stored, with older backups being deleted), and a checkbox below File Deletion that pushes the old backups to the Google Drive trash instead of deleting them immediately.
- Test the correct Google Drive authentication by starting a backup job with this destination. You should now see your backup on Google Drive if it was successful.
