
Table des matières
Dans cet article, nous vous expliquons comment connecter votre espace de stockage HiDrive à BackWPup. Nous vous proposons également un tutoriel sur la manière d'effectuer une sauvegarde vers HiDrive.
Table des matières
Connecter BackWPup HiDrive
In order to save a WordPress backup to HiDrive, you first need to activate a HiDrive Storage Cloud Plan. If you don’t have an account yet, you can create one here. After installing and activating a BackWPup Pro on your website, follow these steps to backup your WordPress site to HiDrive.
- In the BackWPup settings, choose HiDrive as your storage option. This can be done during the backup setup or by navigating to the settings page.
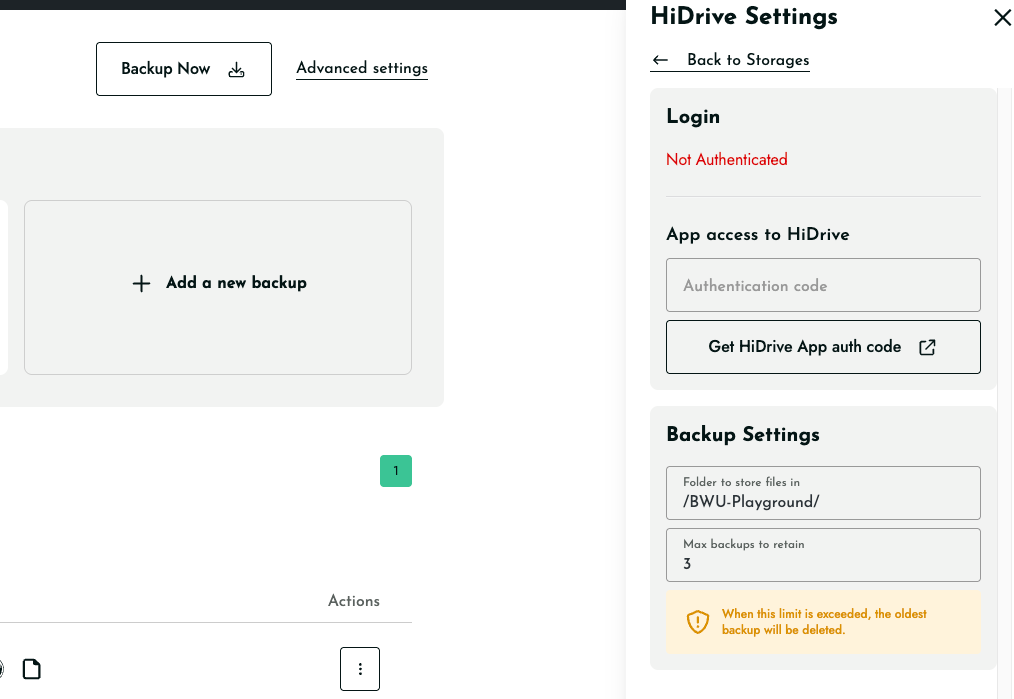
- Si vous n'êtes pas encore authentifié, le message « Non authentifié ! » s'affichera en rouge en haut de la page des paramètres.
- To authenticate, click get app auth code, which will open login page for HiDrive in new tab:
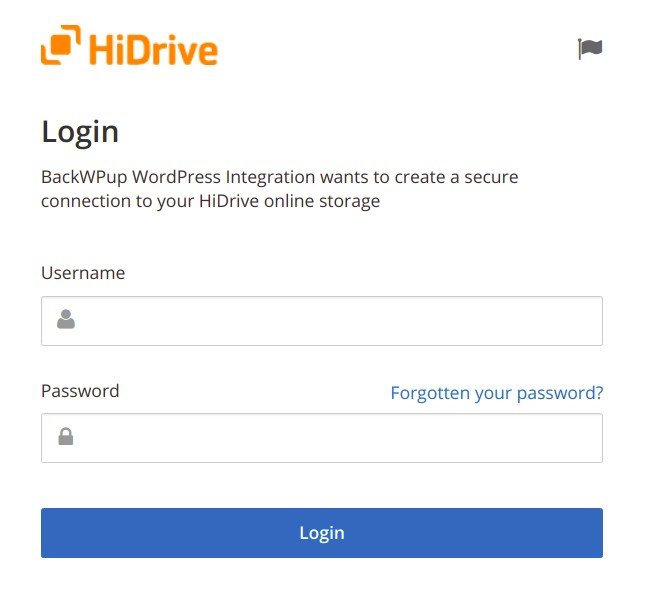
Se connecter via le formulaire HiDrive - Autorisez l'accès au HiDrive .
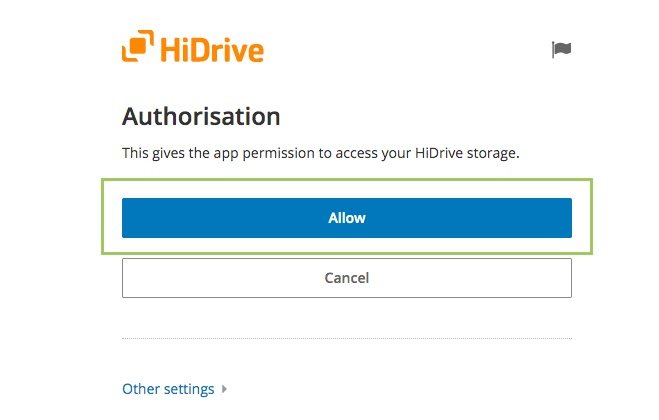
Autoriser l'accès au stockage - Vous recevez alors un code d'autorisation ; copiez ce codee.
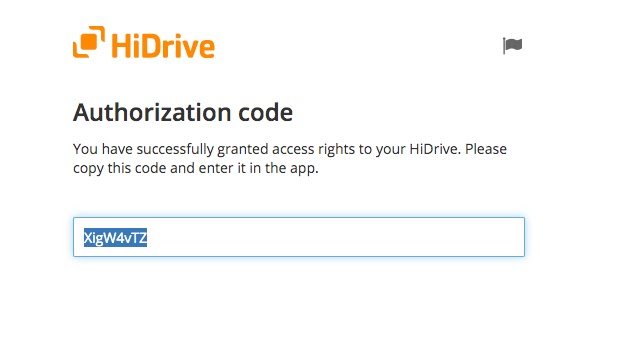
Génération du code HiDrive - Head back to the BackWPup To:HiDrive settings page and paste the authorization code into field and click on the “Save Changes” button.
Une fois l'installation terminée, lancez une sauvegarde pour vous assurer que tout est correctement configuré. Cette étape permet de vérifier que le processus de sauvegarde fonctionne comme prévu.Configuration de l'emplacement de stockage des sauvegardes
Configuration de l'emplacement de stockage des sauvegardes 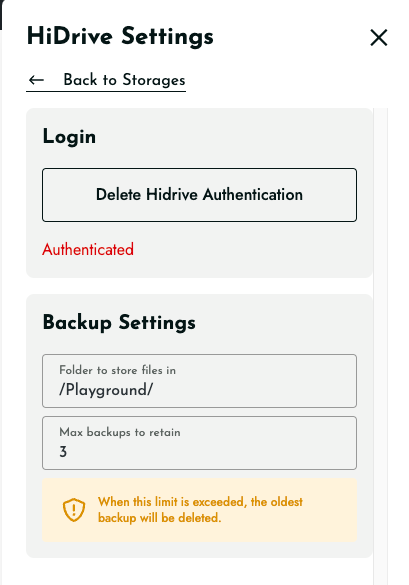
- Nom du dossier de stockage :
- Specify the folder name where your backups will be stored. If using App authentication, it will be located under the ‘Apps/BackWPup’ directory in your Dropbox.
- Gestion des fichiers :
- In the ‘File Deletion’ setting, determine the maximum number of backups to keep in Dropbox. Setting this limit helps manage storage space by deleting the oldest backup when the maximum is reached.
