
Check out the benefits of a WordPress Backup to Google Drive.
Backing up your WordPress site to Google Drive with BackWPup ensures your data is securely saved off-site. Below is a detailed guide to help you set up this process effectively.
Setting Up Google Drive Authentication for BackWPup:
- Accedi al tuo account Google e vai alla Console di Google Cloud.
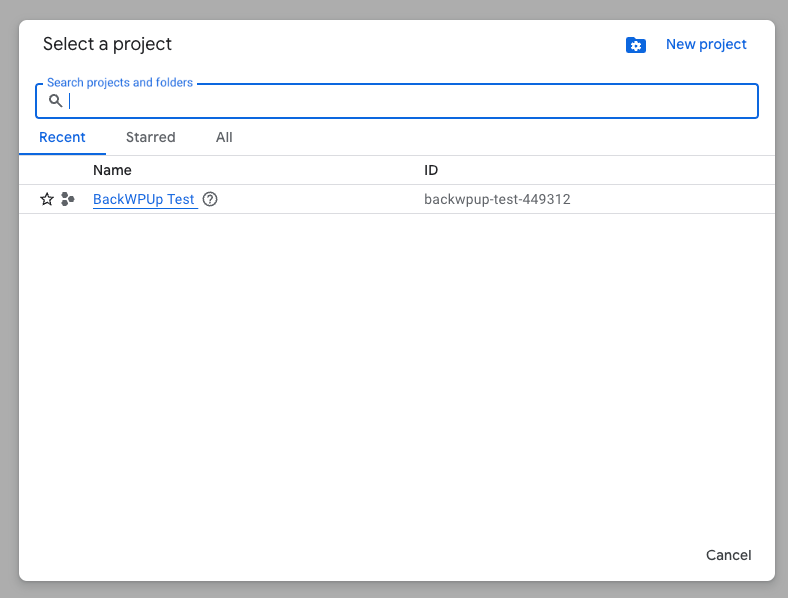
- Crea un nuovo progetto e selezionalo una volta creato.
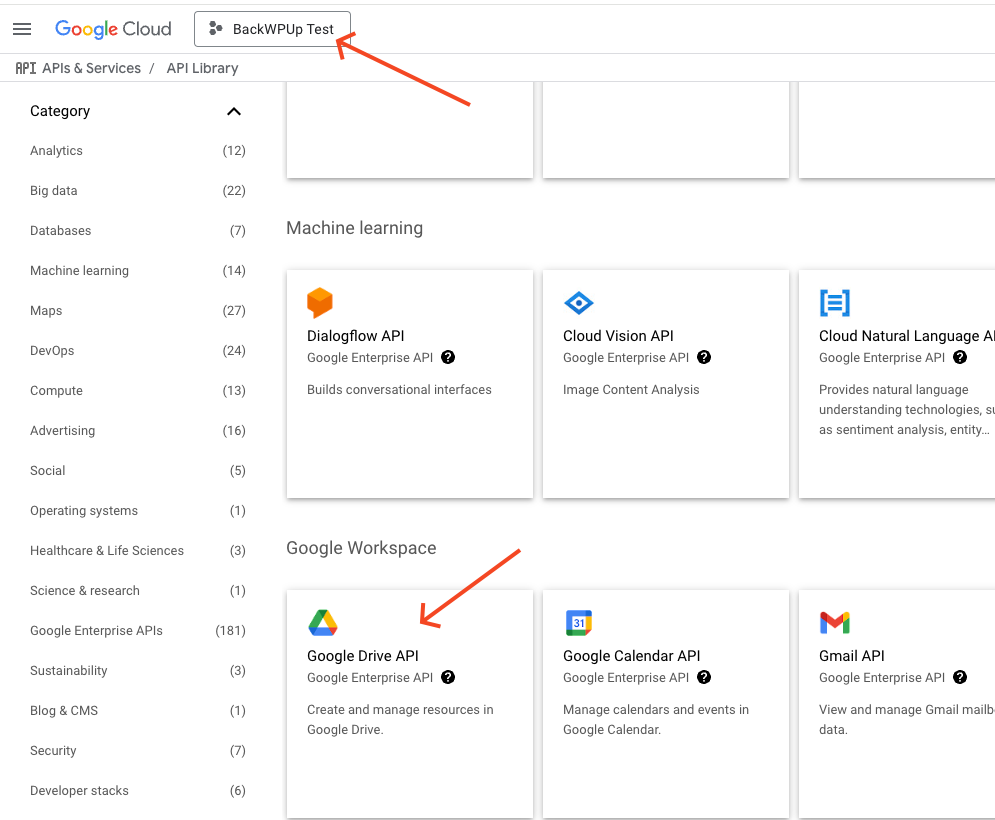
- Search for the Google Drive API in the library and enable it for your project.
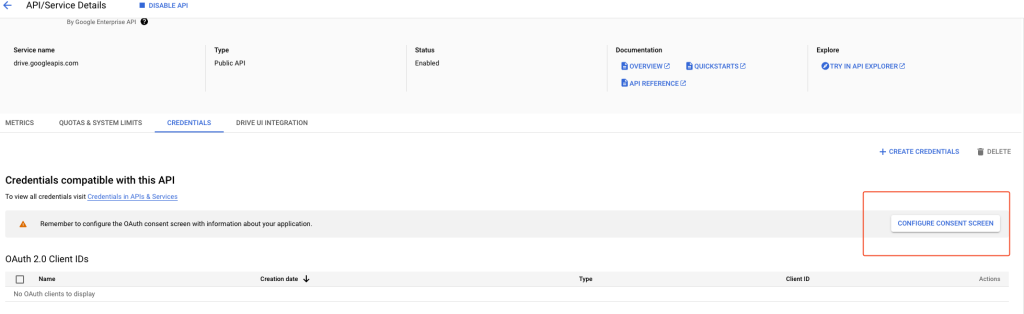
- Fai clic su "Credenziali" nella barra laterale. Se viene richiesta la configurazione della schermata di consenso perché non è stata impostata in precedenza, fai clic su "CONFIGURA SCHERMATA DI CONSENSO".
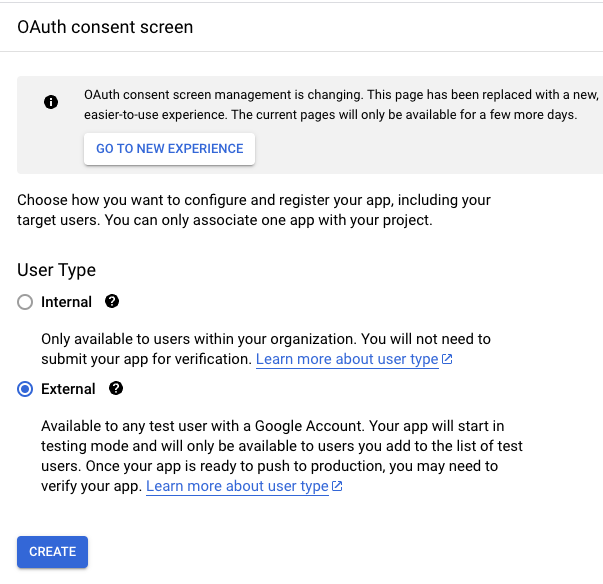
- Nella schermata successiva, seleziona l'opzione "Esterno".
- Infine, nella schermata successiva, inserisci il nome dell'applicazione, il tuo account Google per l'assistenza via e-mail e il tuo indirizzo e-mail nella sezione "Contatti dello sviluppatore".
- Completa la procedura premendo il pulsante «Salva» nelle schermate successive fino a quando non torni alla Dashboard.
- Una volta effettuate queste impostazioni, l'autenticazione viene impostata di default in modalità di prova. Per passare alla modalità di produzione quando devi utilizzare l'app in tale modalità, seleziona il link alla schermata di approvazione OAuth nel menu a sinistra e clicca su PUBBLICA APP.
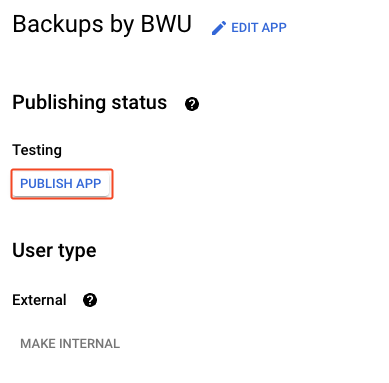
- Working in test mode restricts access to Google Drive, making the authentication process more limited.
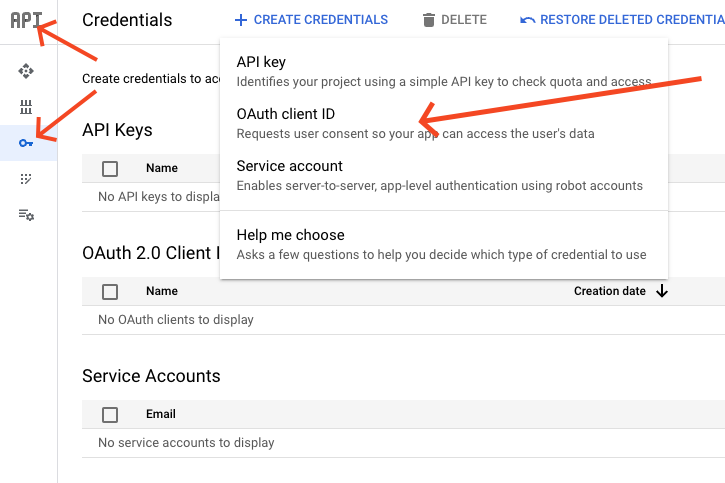
- Una volta configurata la schermata di consenso, clicca sul link "Credenziali" nella dashboard principale, quindi clicca sul link "+ CREA DATI DI ACCESSO" e seleziona "ID client OAuth". Verrai reindirizzato a una nuova pagina.
- In "Tipo di applicazione", selezionare "Applicazione web" e inserire un nome per l'applicazione web. Lasciare vuoto il campo "Fonti JavaScript autorizzate".
- In your WordPress admin area, go to storage options and select Google Drive, and go to the Google API Keys section.
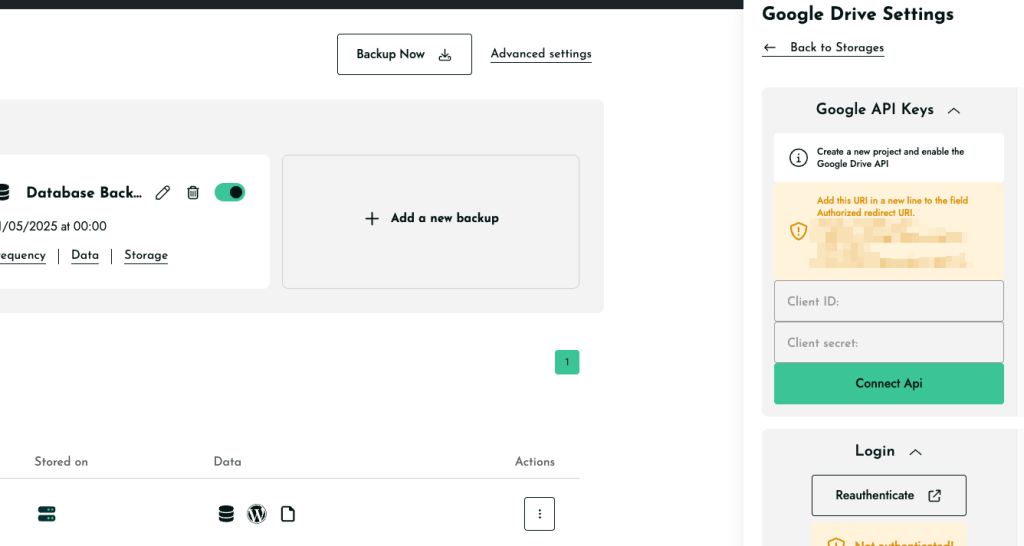
- Copy the displayed URL under Redirect URIs and paste it into the Authorized redirect URI field in the Google Drive form.
- Quindi clicca su Crea.
- A quel punto, il client verrà creato e ti verranno mostrati l'ID client e il segreto client.
- Copy the Google Drive Client ID and Secret and paste them into the BackWPup backend in the field Client ID and Client Secret. Then, save the BackWPup settings.
- Ora vai alla scheda "Accedi".
- You are redirected to Google and have to allow BackWPup access to Google Drive. Click on Allow.
- After this, you will be redirected to your WordPress admin area, where you should see the successful authentication.
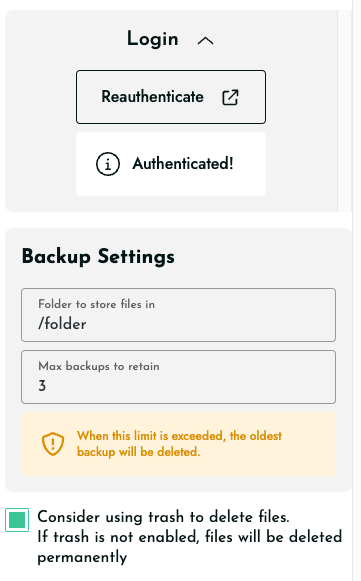
- On the settings page, there are some more options: Folder in Google Drive (name of the folder where all backups will be stored), File Deletion (the maximum number of backups to be stored, with older backups being deleted), and a checkbox below File Deletion that pushes the old backups to the Google Drive trash instead of deleting them immediately.
- Test the correct Google Drive authentication by starting a backup job with this destination. You should now see your backup on Google Drive if it was successful.
