
Indice
In questo articolo spieghiamo come collegare il tuo spazio di archiviazione HiDrive a BackWPup. Forniamo inoltre una guida su come eseguire un backup su HiDrive.
Indice
Collega BackWPup HiDrive
In order to save a WordPress backup to HiDrive, you first need to activate a HiDrive Storage Cloud Plan. If you don’t have an account yet, you can create one here. After installing and activating a BackWPup Pro on your website, follow these steps to backup your WordPress site to HiDrive.
- In the BackWPup settings, choose HiDrive as your storage option. This can be done during the backup setup or by navigating to the settings page.
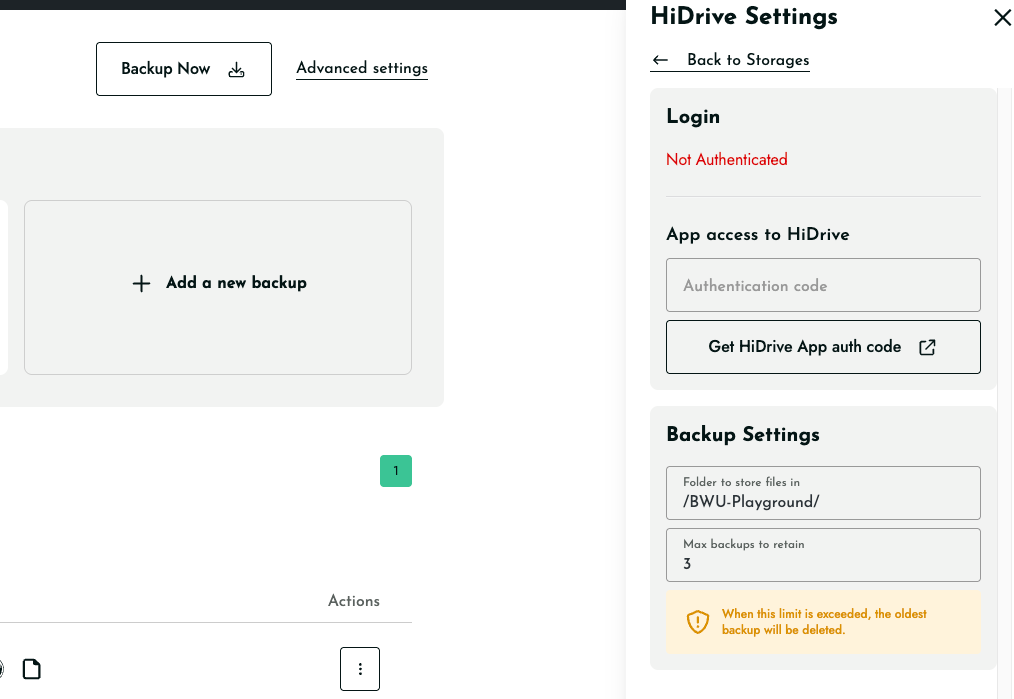
- Se non hai ancora effettuato l'autenticazione, vedrai il messaggio «Non autenticato!» in rosso nella parte superiore della pagina delle impostazioni.
- To authenticate, click get app auth code, which will open login page for HiDrive in new tab:
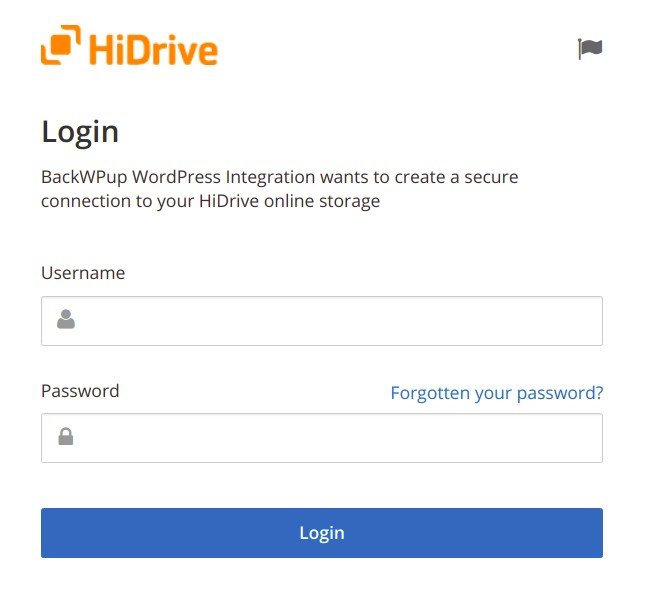
Effettua l'autenticazione nel modulo HiDrive - Concedi l'autorizzazione per accedere allo HiDrive .
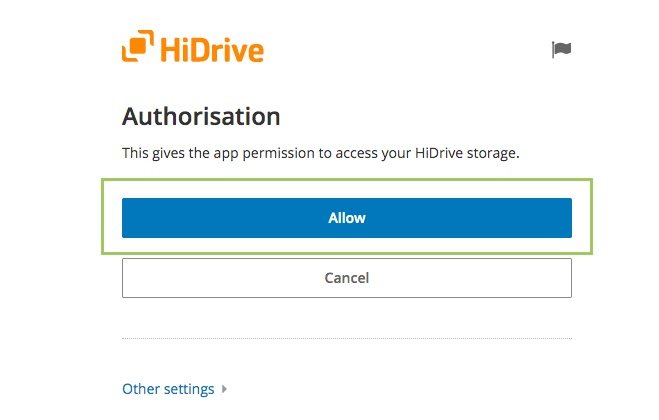
Consenti l'accesso allo spazio di archiviazione - Di conseguenza, riceverai un codice di autorizzazione; copia il codicee.
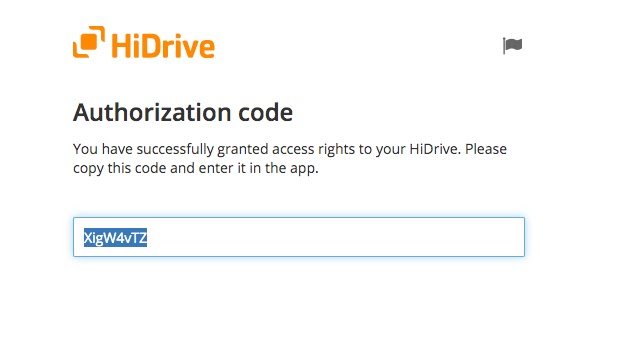
Generazione del codice HiDrive - Head back to the BackWPup To:HiDrive settings page and paste the authorization code into field and click on the “Save Changes” button.
Una volta completata l'installazione, avvia un backup per assicurarti che tutto sia configurato correttamente. Questo passaggio consente di verificare che il processo di backup funzioni come previsto.Configurazione della posizione di archiviazione del backup
Configurazione della posizione di archiviazione del backup 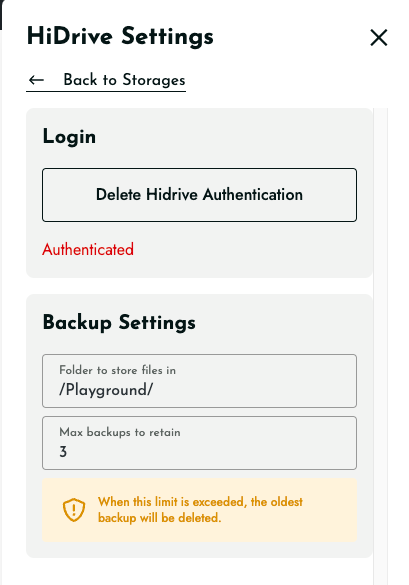
- Nome della cartella di archiviazione:
- Specify the folder name where your backups will be stored. If using App authentication, it will be located under the ‘Apps/BackWPup’ directory in your Dropbox.
- Gestione dei file:
- In the ‘File Deletion’ setting, determine the maximum number of backups to keep in Dropbox. Setting this limit helps manage storage space by deleting the oldest backup when the maximum is reached.
