
Descubre las ventajas de hacer una WordPress en Google Drive.
Backing up your WordPress site to Google Drive with BackWPup ensures your data is securely saved off-site. Below is a detailed guide to help you set up this process effectively.
Setting Up Google Drive Authentication for BackWPup:
- Inicia sesión en tu cuenta de Google y accede a la Consola de Google Cloud.
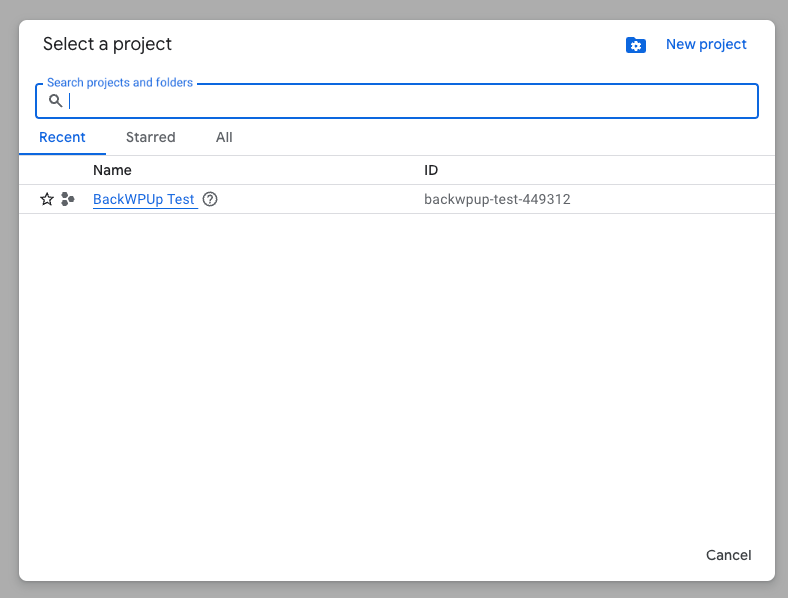
- Crea un nuevo proyecto y selecciónalo una vez que lo hayas creado.
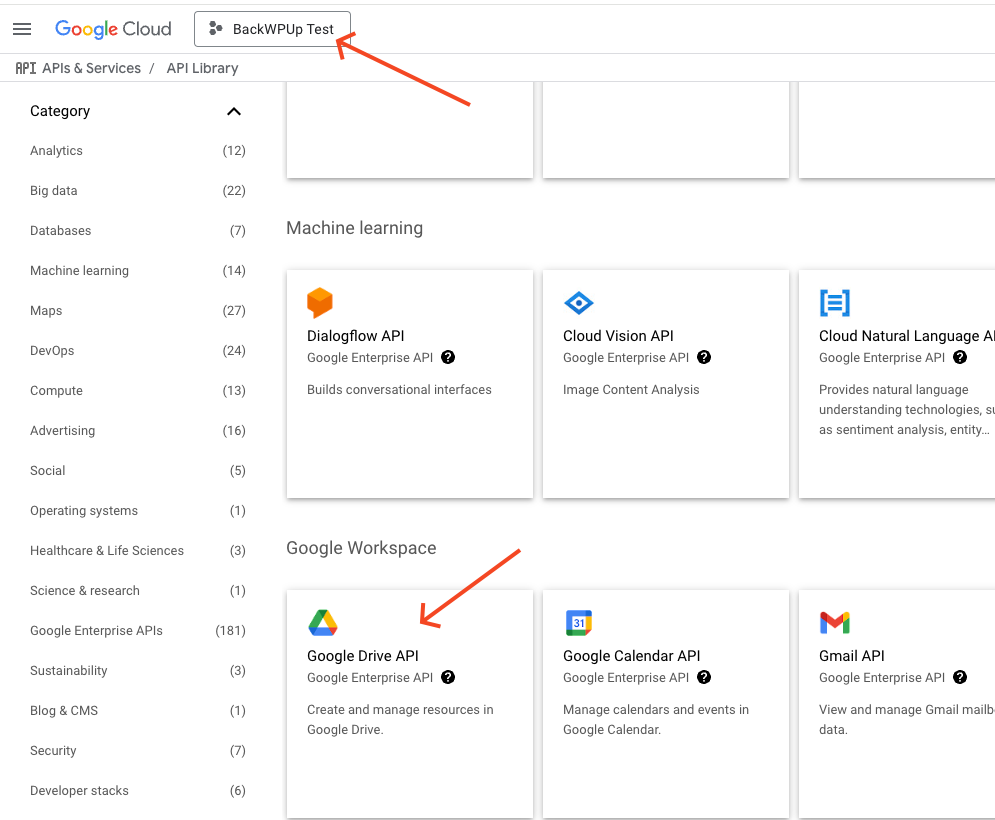
- Search for the Google Drive API in the library and enable it for your project.
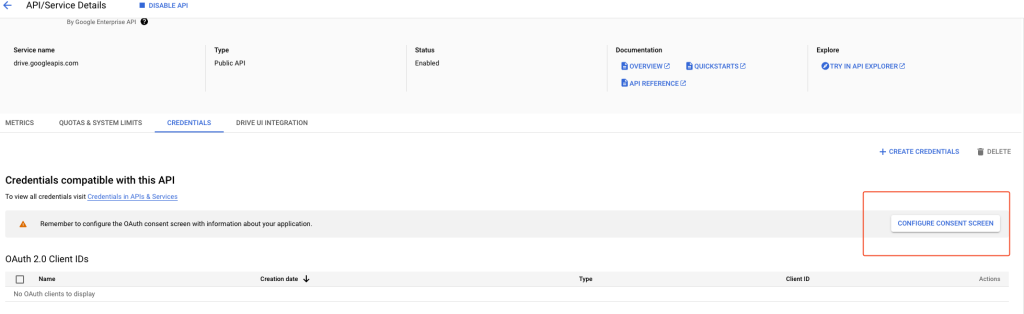
- Haz clic en «Credenciales» en la barra lateral. Si se solicita la configuración de la pantalla de consentimiento porque aún no se ha establecido, haz clic en «CONFIGURAR PANTALLA DE CONSENTIMIENTO».
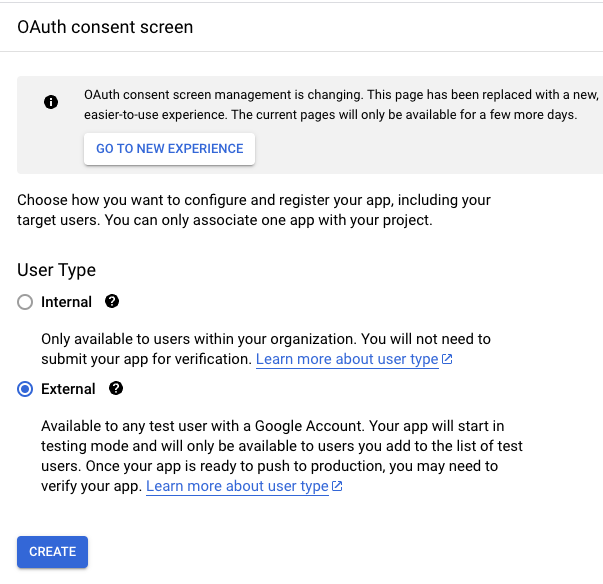
- En la siguiente pantalla, selecciona la opción «Externo».
- Por último, en la siguiente pantalla, introduce el nombre de la aplicación, tu cuenta de Google para recibir asistencia por correo electrónico y tu dirección de correo electrónico en la sección «Contacto del desarrollador».
- Finaliza el proceso pulsando el botón «Guardar» en las siguientes pantallas hasta que vuelvas al panel de control.
- Una vez realizadas estas configuraciones, la autenticación se establece en modo de prueba de forma predeterminada. Para pasarla a producción cuando necesites utilizar la aplicación en modo de producción, selecciona el enlace a la pantalla de aprobación de OAuth en el menú de la izquierda y haz clic en «PUBLICAR APLICACIÓN».
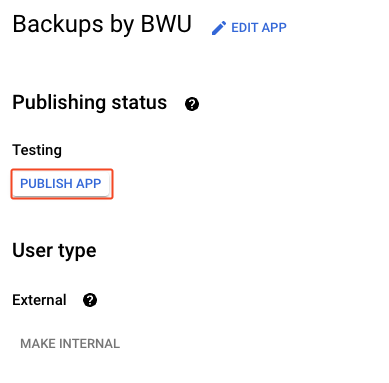
- Working in test mode restricts access to Google Drive, making the authentication process more limited.
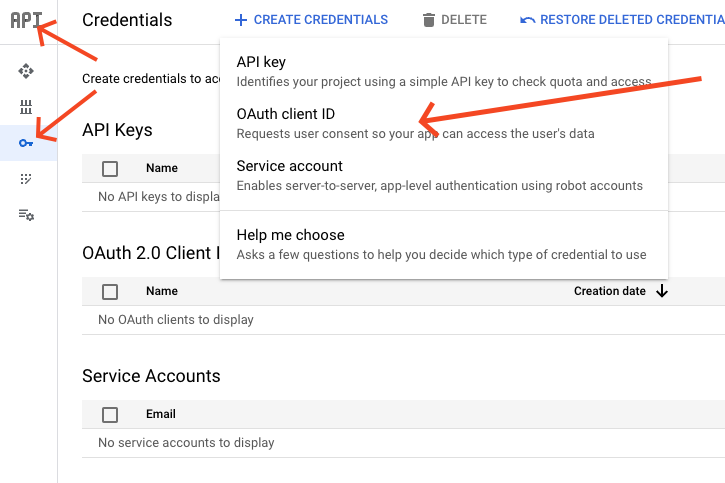
- Una vez configurada la pantalla de consentimiento, haz clic en el enlace «Credenciales» del panel de control principal y, a continuación, haz clic en el enlace «+ CREAR DATOS DE INICIO DE SESIÓN» y selecciona «ID de cliente de OAuth». Se te redirigirá a una nueva página.
- En «Tipo de aplicación», selecciona «Aplicación web» e introduce un nombre para la aplicación web. Deja el campo «Fuentes de JavaScript autorizadas» en blanco.
- In your WordPress admin area, go to storage options and select Google Drive, and go to the Google API Keys section.
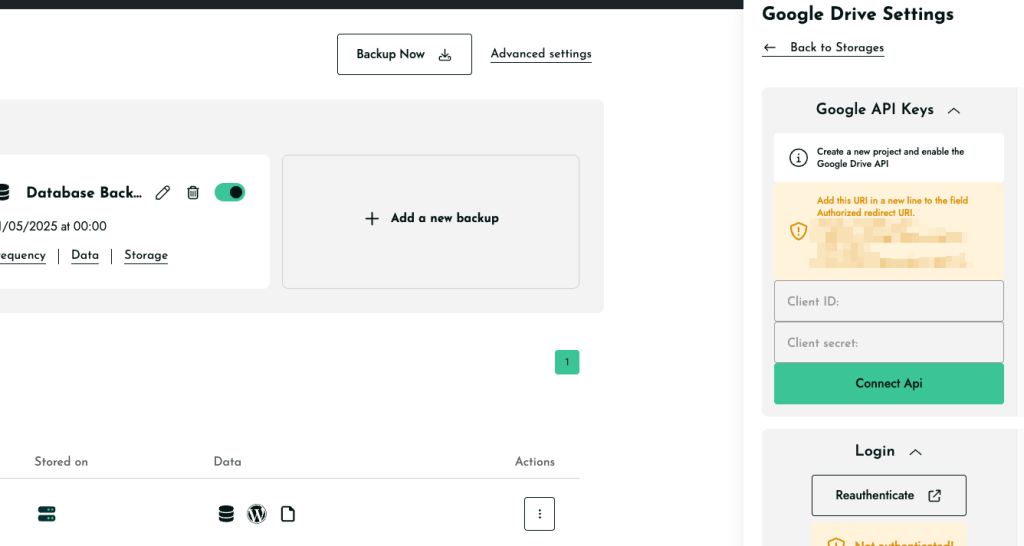
- Copy the displayed URL under Redirect URIs and paste it into the Authorized redirect URI field in the Google Drive form.
- A continuación, haz clic en «Crear».
- A continuación, se creará el cliente y se te mostrarán el ID y el secreto del cliente.
- Copy the Google Drive Client ID and Secret and paste them into the BackWPup backend in the field Client ID and Client Secret. Then, save the BackWPup settings.
- Ahora ve a la pestaña de inicio de sesión.
- You are redirected to Google and have to allow BackWPup access to Google Drive. Click on Allow.
- A continuación, se le redirigirá al panel WordPress , donde debería ver que la autenticación se ha realizado correctamente.
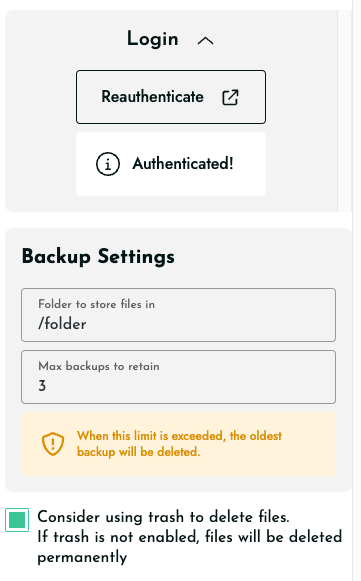
- On the settings page, there are some more options: Folder in Google Drive (name of the folder where all backups will be stored), File Deletion (the maximum number of backups to be stored, with older backups being deleted), and a checkbox below File Deletion that pushes the old backups to the Google Drive trash instead of deleting them immediately.
- Test the correct Google Drive authentication by starting a backup job with this destination. You should now see your backup on Google Drive if it was successful.
