
Indice
In this post, we explain how to connect your Microsoft OneDrive cloud storage to BackWPup, and we also give an example of how to perform a backup to OneDrive.
Indice
Registrazione dell'applicazione
To save a backup of your WordPress site to OneDrive, you first need a working OneDrive Application.
First, log in on the Microsoft Azure Portal.
Se non disponi di un account Microsoft, ti verrà chiesto di crearne uno nuovo.
Once you are logged in to the Microsoft Azure Portal, register your Application using the available links, as shown in the figure below.
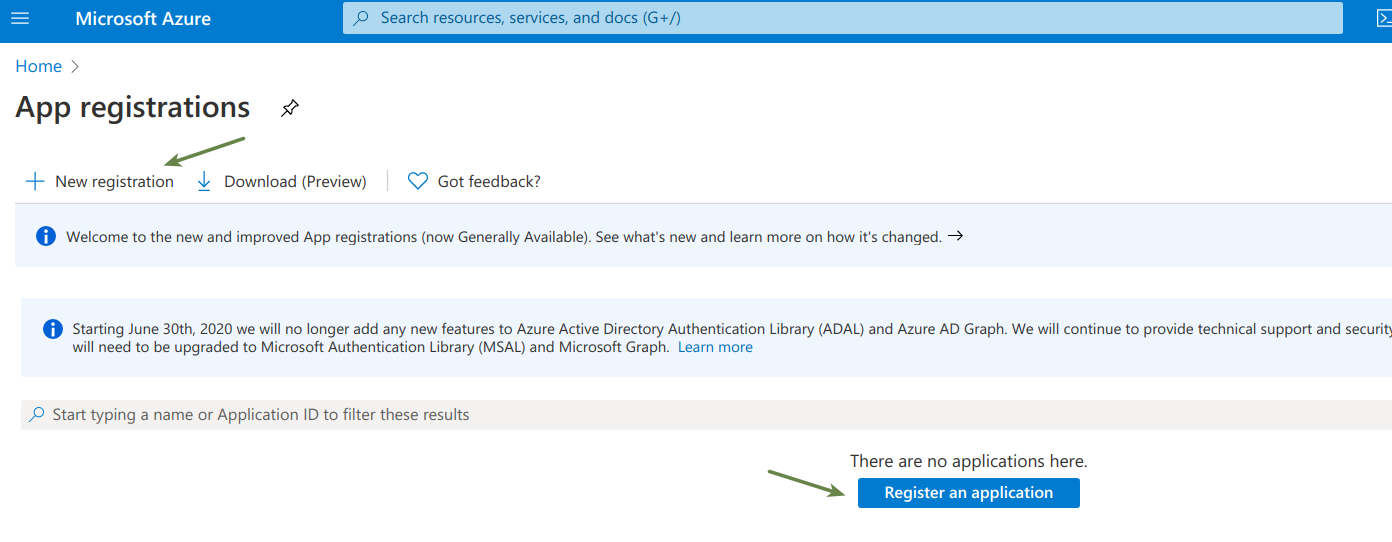
This will take you to the registration page: fill in the requested data and get an Application ID to represent your application in API calls.
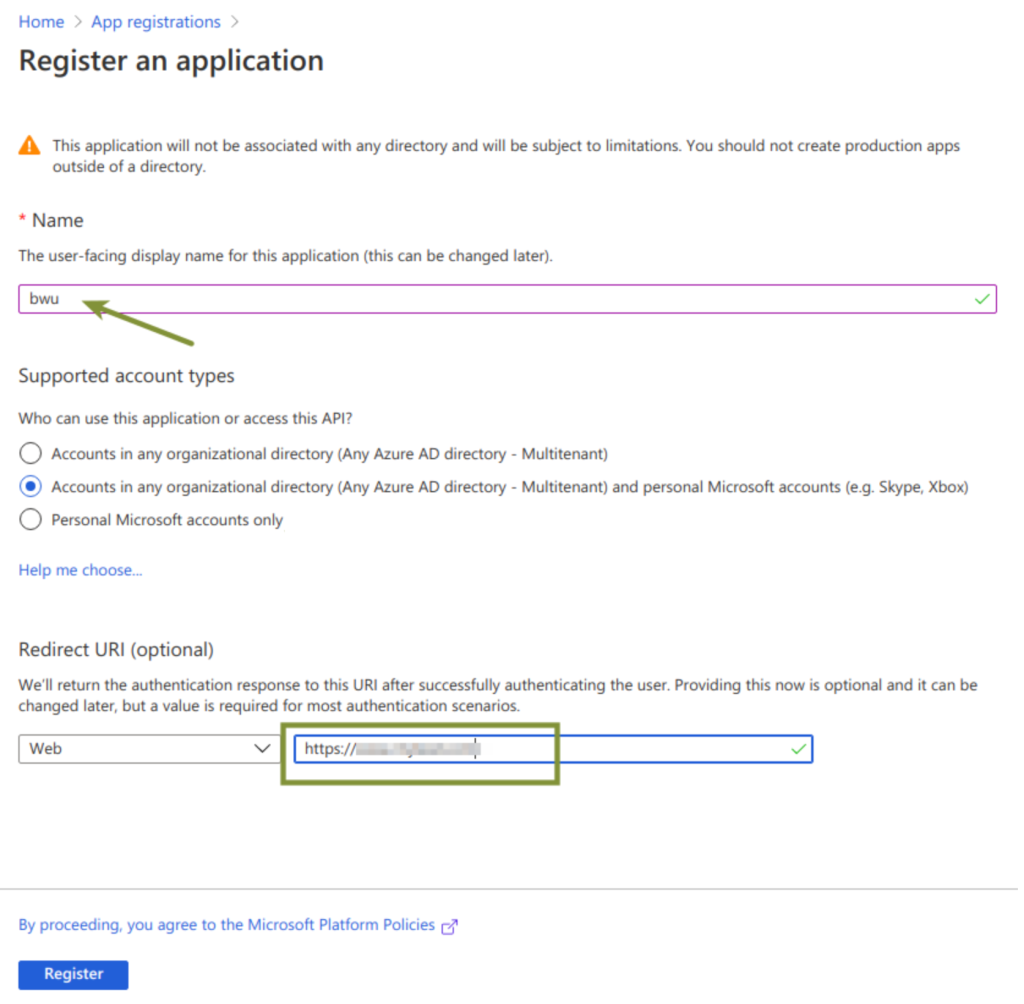
Dopo la registrazione, potrai trovare l' ID cliente nella panoramica dell'applicazione:

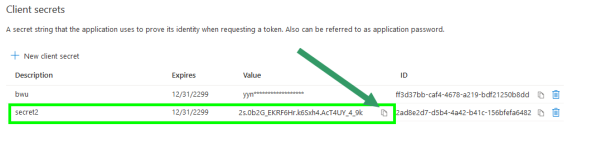
The next step is to create the client secret to connect BackWPup to OneDrive.
Nella pagina "Applicazione" creata nei passaggi precedenti, vai a Certificati e segreti e clicca sul Nuovo segreto client .
Si aprirà un modulo: inserisci i valori richiesti e crea il segreto client.
Set Up the API Key and Redirect the URL
In your WordPress backend, go to the BackWPup → Storage of job → add the Client ID and client secret of the OneDrive Application under OneDrive API Keys.
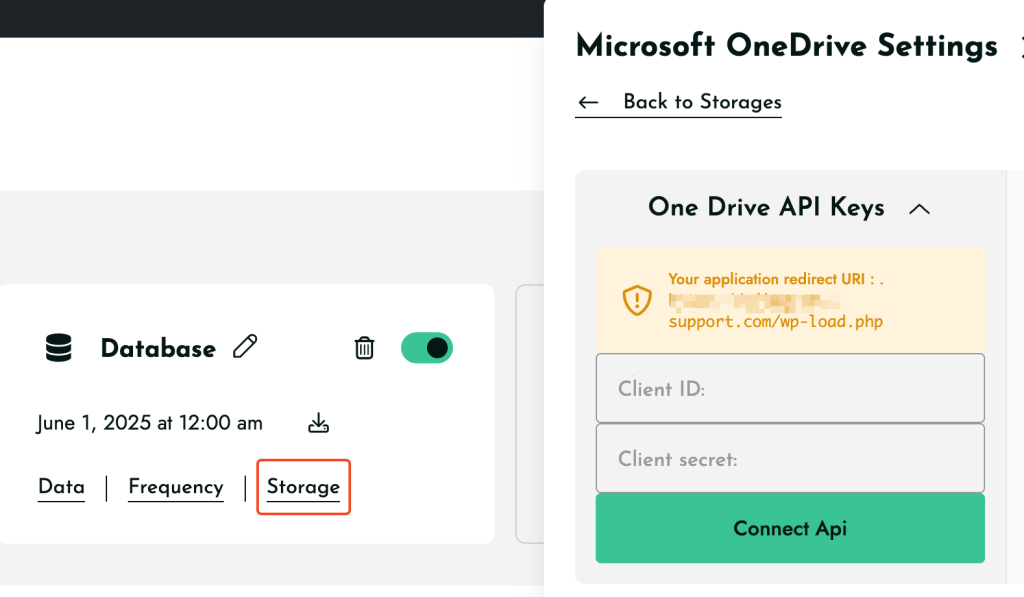
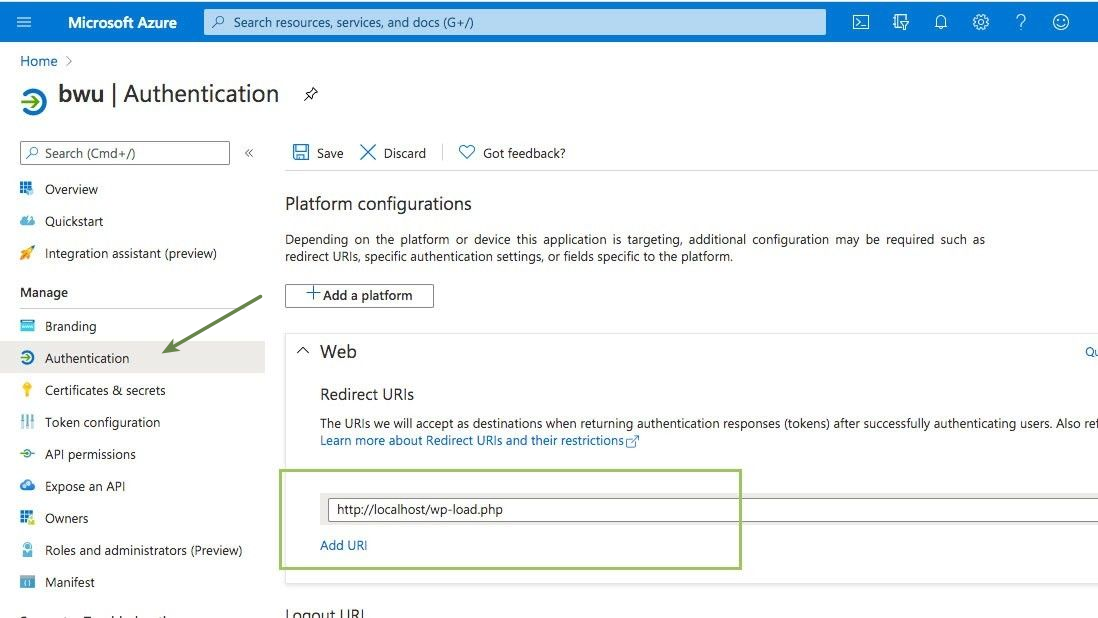
A questo punto, copia l'URL di reindirizzamento dalla sezione.
Then, paste it to your OneDrive Application in Microsoft Azure, by going to the Authentication link on the left menu, and then into the Redirect URL section:
Run a Job in BackWPup: Create the Backup Archive in OneDrive
L'applicazione è stata configurata correttamente nelle sezioni precedenti; ora deve solo essere autenticata.
Head to the To: OneDrive tab, and in the Login, click the Reauthenticate button.

Finalmente hai un lavoro pronto per essere eseguito!
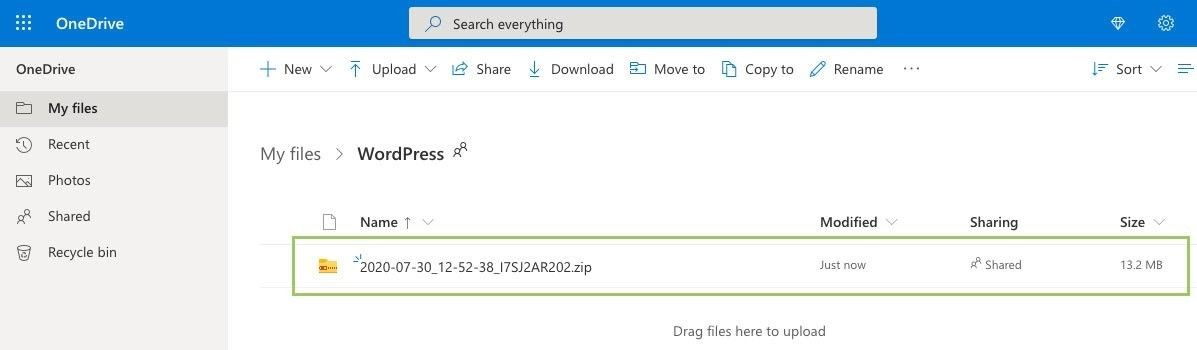
When the job completes successfully, you should see the correctly uploaded backup archive file in your OneDrive app: Backup Archive to OneDrive.
Risoluzione del problema relativo all'indisponibilità della funzione "Nuova registrazione"
Se utilizzi un account Microsoft personale (come Gmail, Outlook, Hotmail, ecc.), è possibile che il pulsante "Nuova registrazione " non sia immediatamente visibile in Azure.
Microsoft richiede ora che ogni account disponga di una directory di Azure attiva prima di poter creare un'applicazione.
You can activate a free directory using either of the following options:
Option 1: Create a free Azure account
This automatically provisions a directory and enables App Registration.
https://azure.microsoft.com/en-us/pricing/purchase-options/azure-account
Option 2: Join the free Microsoft 365 Developer Program
This also creates a directory and allows App Registrations to work.
https://developer.microsoft.com/microsoft-365/dev-program
Una volta completata una delle due opzioni, accedi nuovamente al Portale di Azure e vai su:
Azure Active Directory → Registrazioni di app
Il pulsante Nuova registrazione sarà ora disponibile e potrai procedere con i passaggi sopra indicati.
